Objectives
- Create screen sequence diagram for your assignment.
- Create the first prototype of the user interface of your assignment.
Introduction
- Manual - screens are drawn by hand on paper ([4] ) or on predefined templates (for example [8] ). Interactive parts of the screen or components are cut out so that you can easily interchange them. Drawn components can be glued together so that they create groups of components.
- With templates - similar to manual prototyping, but the screens are composed with the use of printed component templates [5] . These can be drawn, preprinted on paper or cut out of a paper. Advantage to manual prototyping with hand is saving time during the desing of the screen, as the components do not need to be hand drawn as they are already prepared. Also the design is often enriched as all available components are easily observable.
- With use of a tool - extension of manual and template prototyping. It allows you to make paper prototypes "interactive", because it is possible to create transitions between screens. Screens can be hand drawn and photographed, or created with the use of chosen tool.
Screen Sequence Diagram - SSQ (also called State Transition Diagram - STD) is used for creating
a prototype for designing connection between each screen and deciding transitions between them.
Prototyping techniques are used after designing the screen sequence diagram for creating a user interface prototype.
Most common, fastest and cheapest form of this is the paper prototyping
[4]
[5] ,
that allows you to quickly and easily create a prototype of a user interface.
There are three basic ways of creating paper prototypes of software applications:
Instructions
-
SSQ is created with the purpose of identify all screens that the user interface consist of and actions that cause transitions between the different screens. Examples of simple SSQ are shown on following pictures.
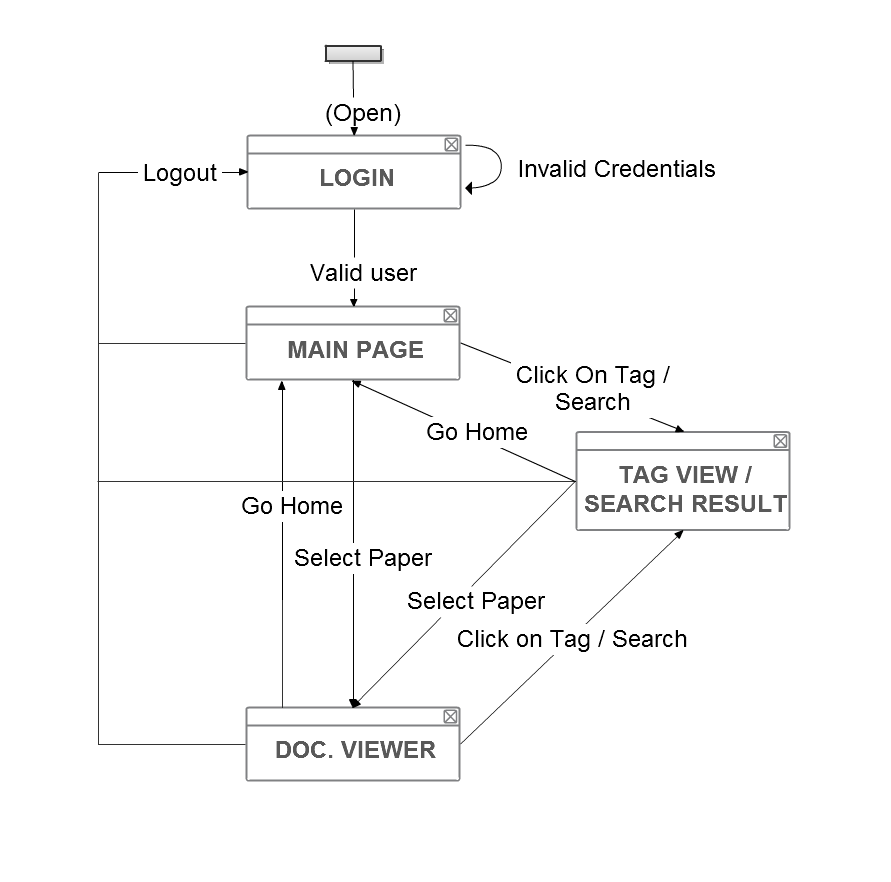 Fig.: Simple SSQ of user interface for article sharing. ([9])
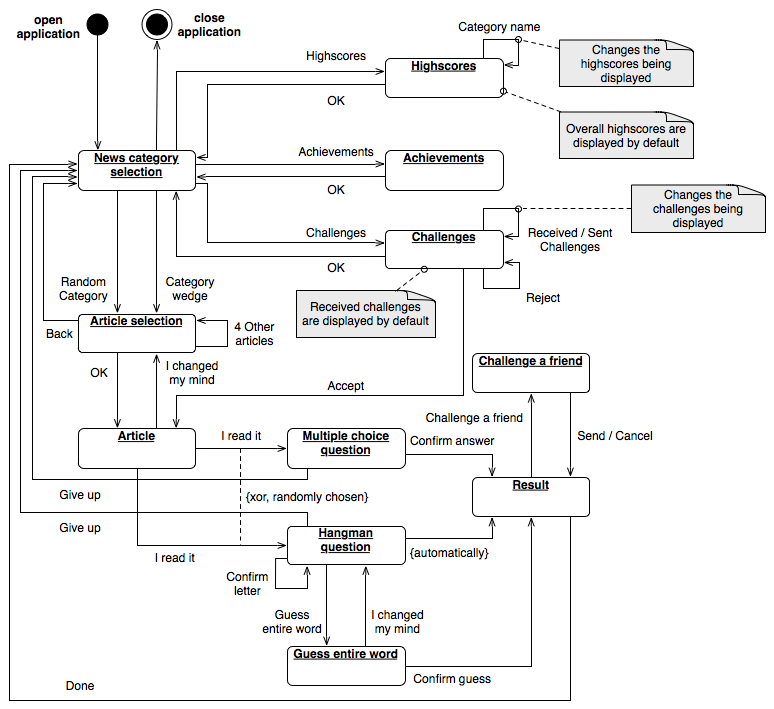 Fig.: SSQ example for the game of social news "Freddy’s News Quiz" ([9])
If SSQ does not contain details about screens, it is needed to describe each connection so that it is clear what action happened.
Task: Draw simple SSQ of the user interface of your assignment. By simple we mean that the diagram does not include screen details, just their names.
You can draw it with hand (fastest approach) or with a software tool. -
There are three types of prototypes [7] :
- Static - the static screens are used for preliminary drafts of the user interface.
- Dynamic - contains basic interaction in the form of changing screens. They are used to check the correctness of the screen sequences.
- Interactive - they contain advanced interactions, animations, videos and so on. They appear as a finished application. They are created in the final stages of development, when user testing is needed, for example when deciding between multiple versions of the user interface.
After static design (that is usually done manually for the speed of its creation) it is usefull to improve it with interactions. There are multiple tools for this.
Tab.: Overview of some available prototyping toolsTool For Availability Component panels Transitions between screens Animations Description Tutorial POP
(Windows verzia)Mobile applications Free No Simple No Screens are taken as photos, imported into POP. Then there are defined sectors in them that are interactive. video Pidoco Web applications(and others) 31-day trial version Yes Simple No Web tool for prototyping web applications. [11] Balsamiq Mockups All 30-day trial version Yes Simple No Web and WIMP application for fast prototyping. [12] JustInMind All 30-day trial version Native Animated Yes WIMP application for creating pixel perfect [7] prototypes with advanced component sets and support for animating screen transitions and individual components on the screens. [13] Microsoft PowerPoint All Free on MSDN No Animated Yes Not primary meant for prototyping, although it is used because of simple use and its support of animations and screen transitions. It is also possible to download component sets for the sake of prototyping (more in the tutorial). [10] inVISION All 7-day trial version No Animated Yes Online application similar to POP, allows you to upload images of finished prototype and link actions for individual parts of the screen. porovnanie Figma All Completely free Yes Yes No Online application, allows the creation of multiple screens on a single canvas and links between them. This creates map of screens. It is possible to link any created element. This tool has support for use by a team. Shows after registration Task: Chose a method and tool and create the first prototype of the user interface for your assignment.Note: Diagram should contain all screens needed for the realization of the scenario that was created on the last lecture.
-
SSQ is often an inseparable part of prototyping. SSQ alone, without the drawings of the screens, does not allow us to picture the design of the user interface. That is why we can use a combination of a SSQ with the drawings of screens. The result is shown on the figures below:
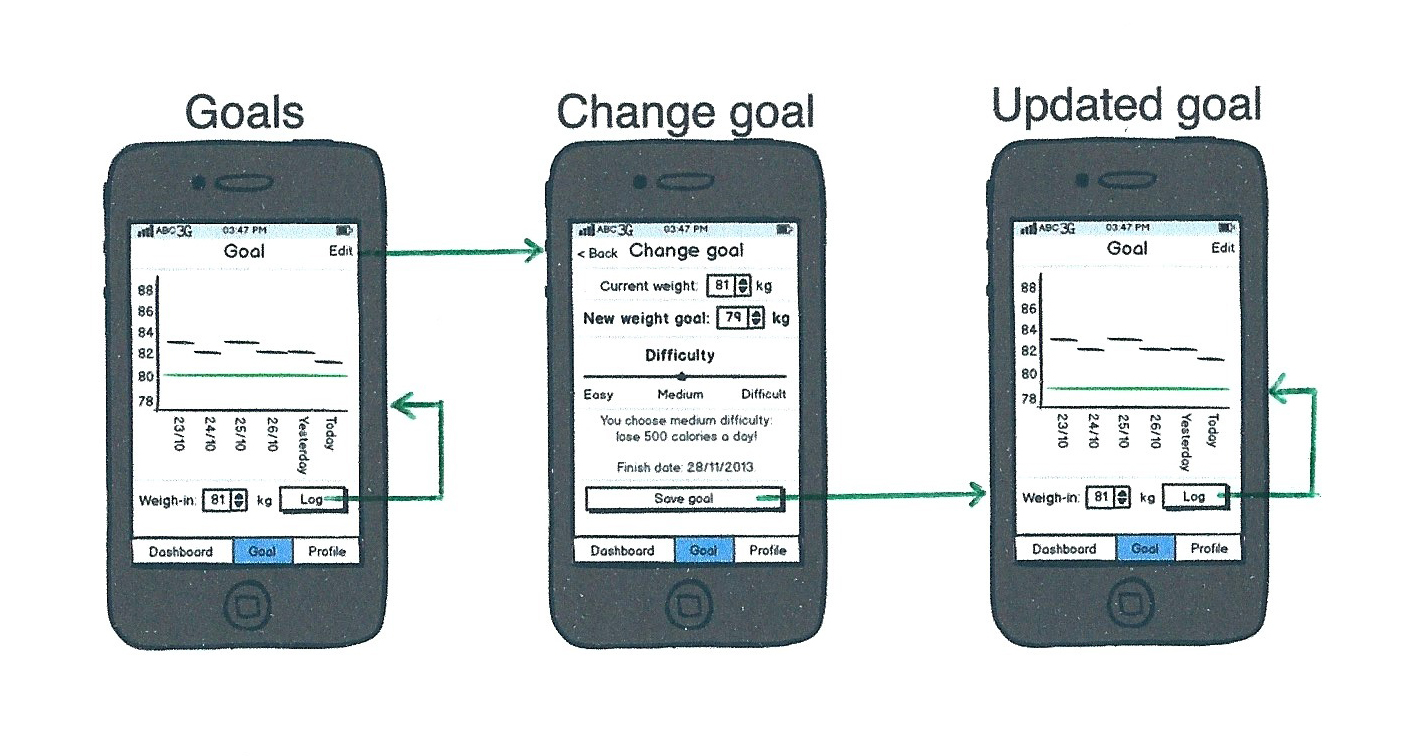
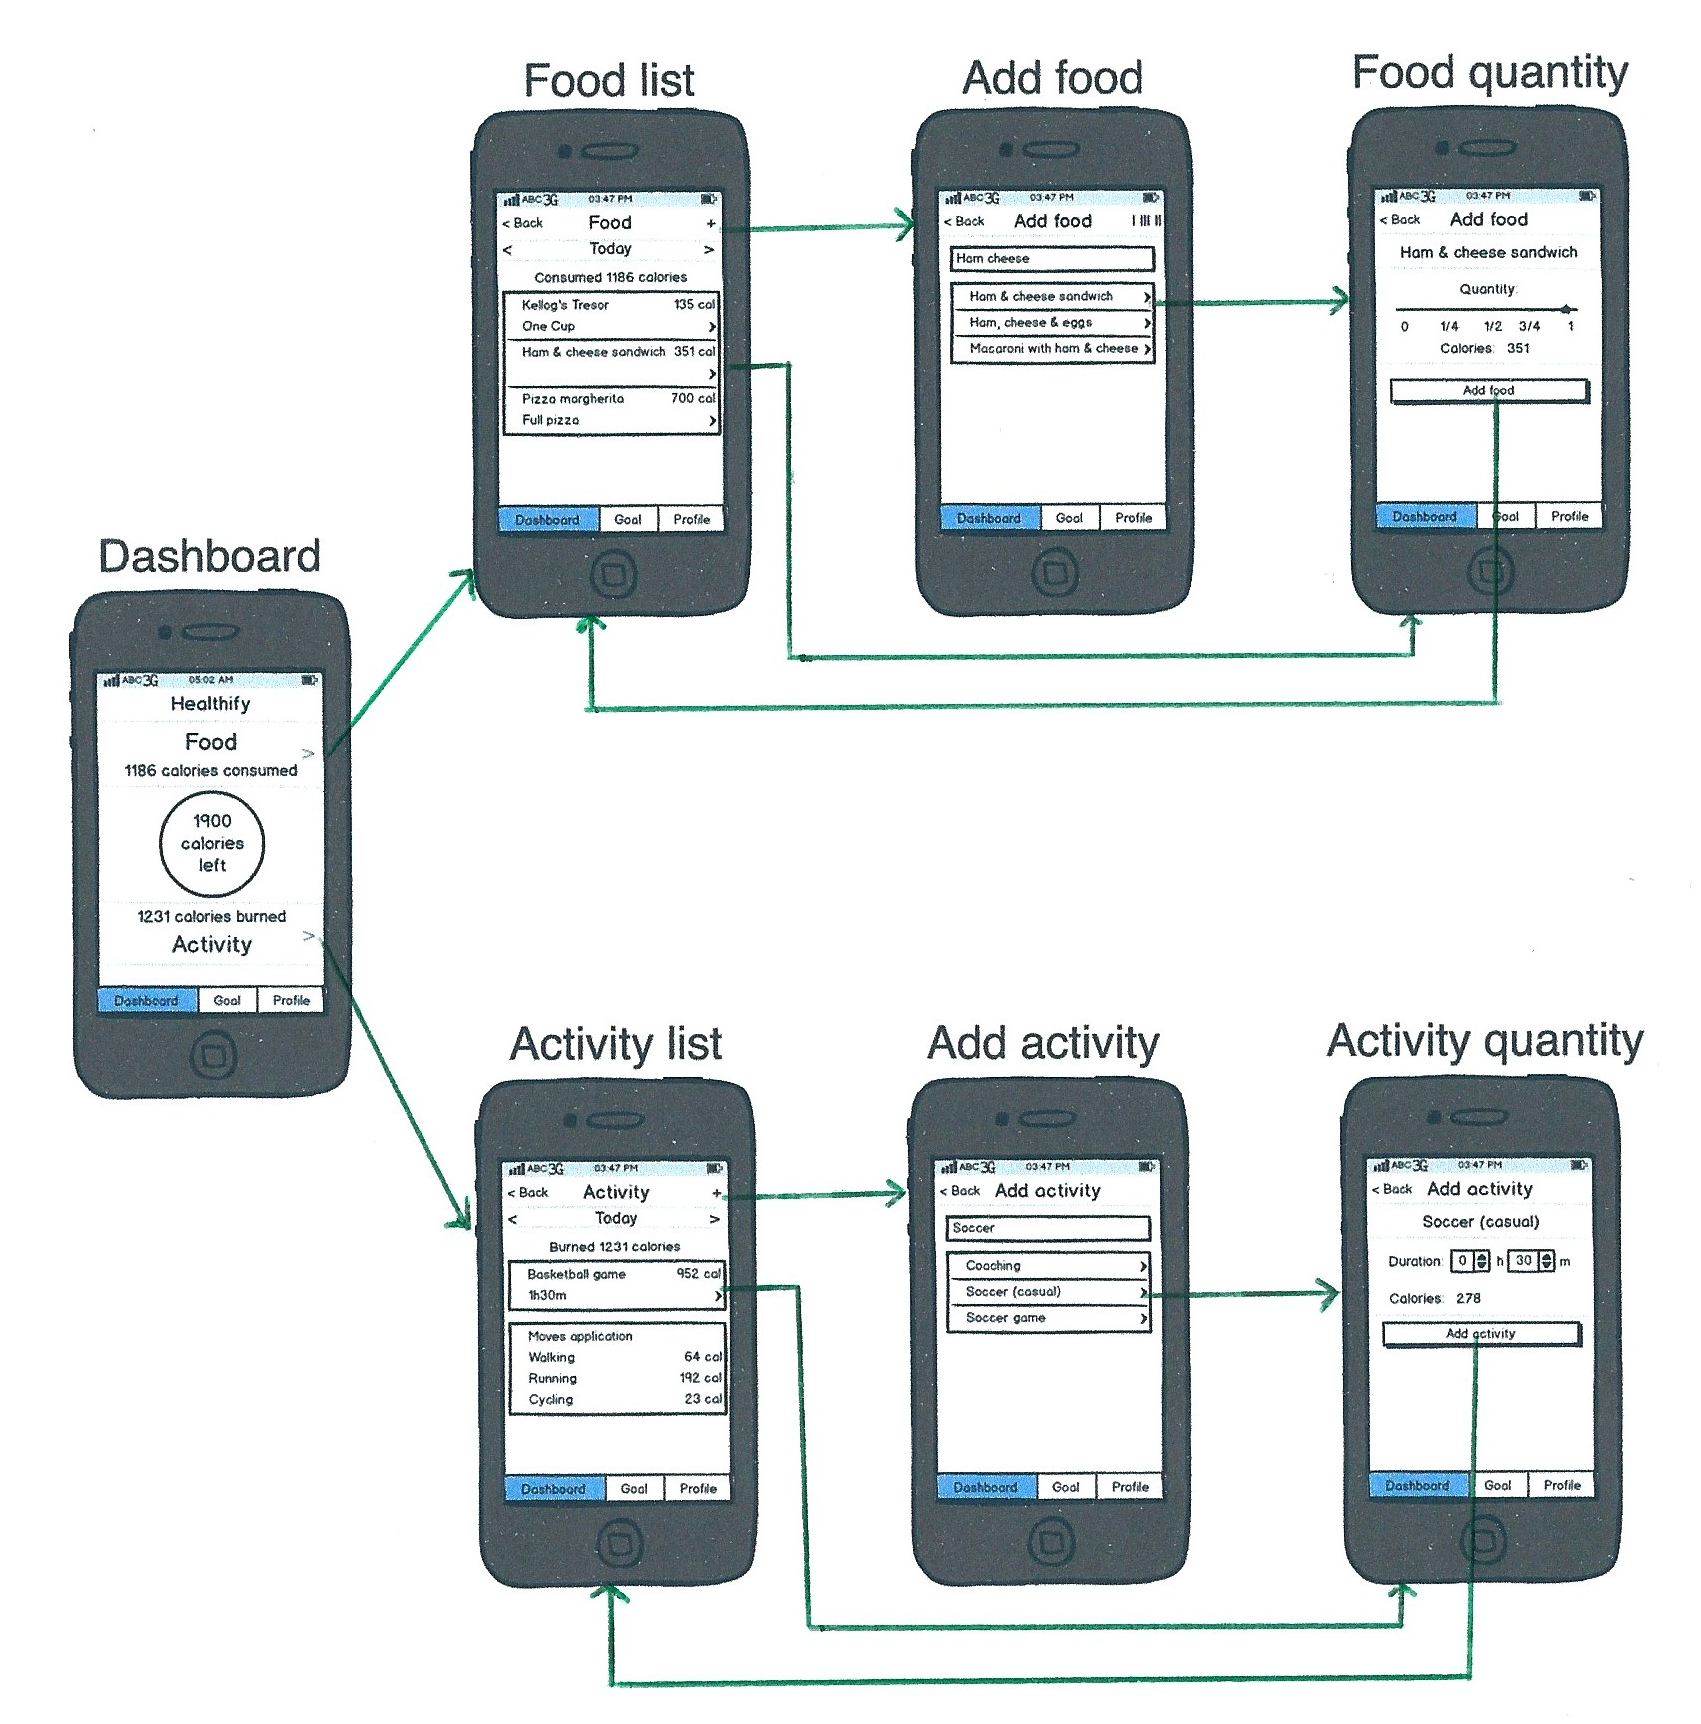
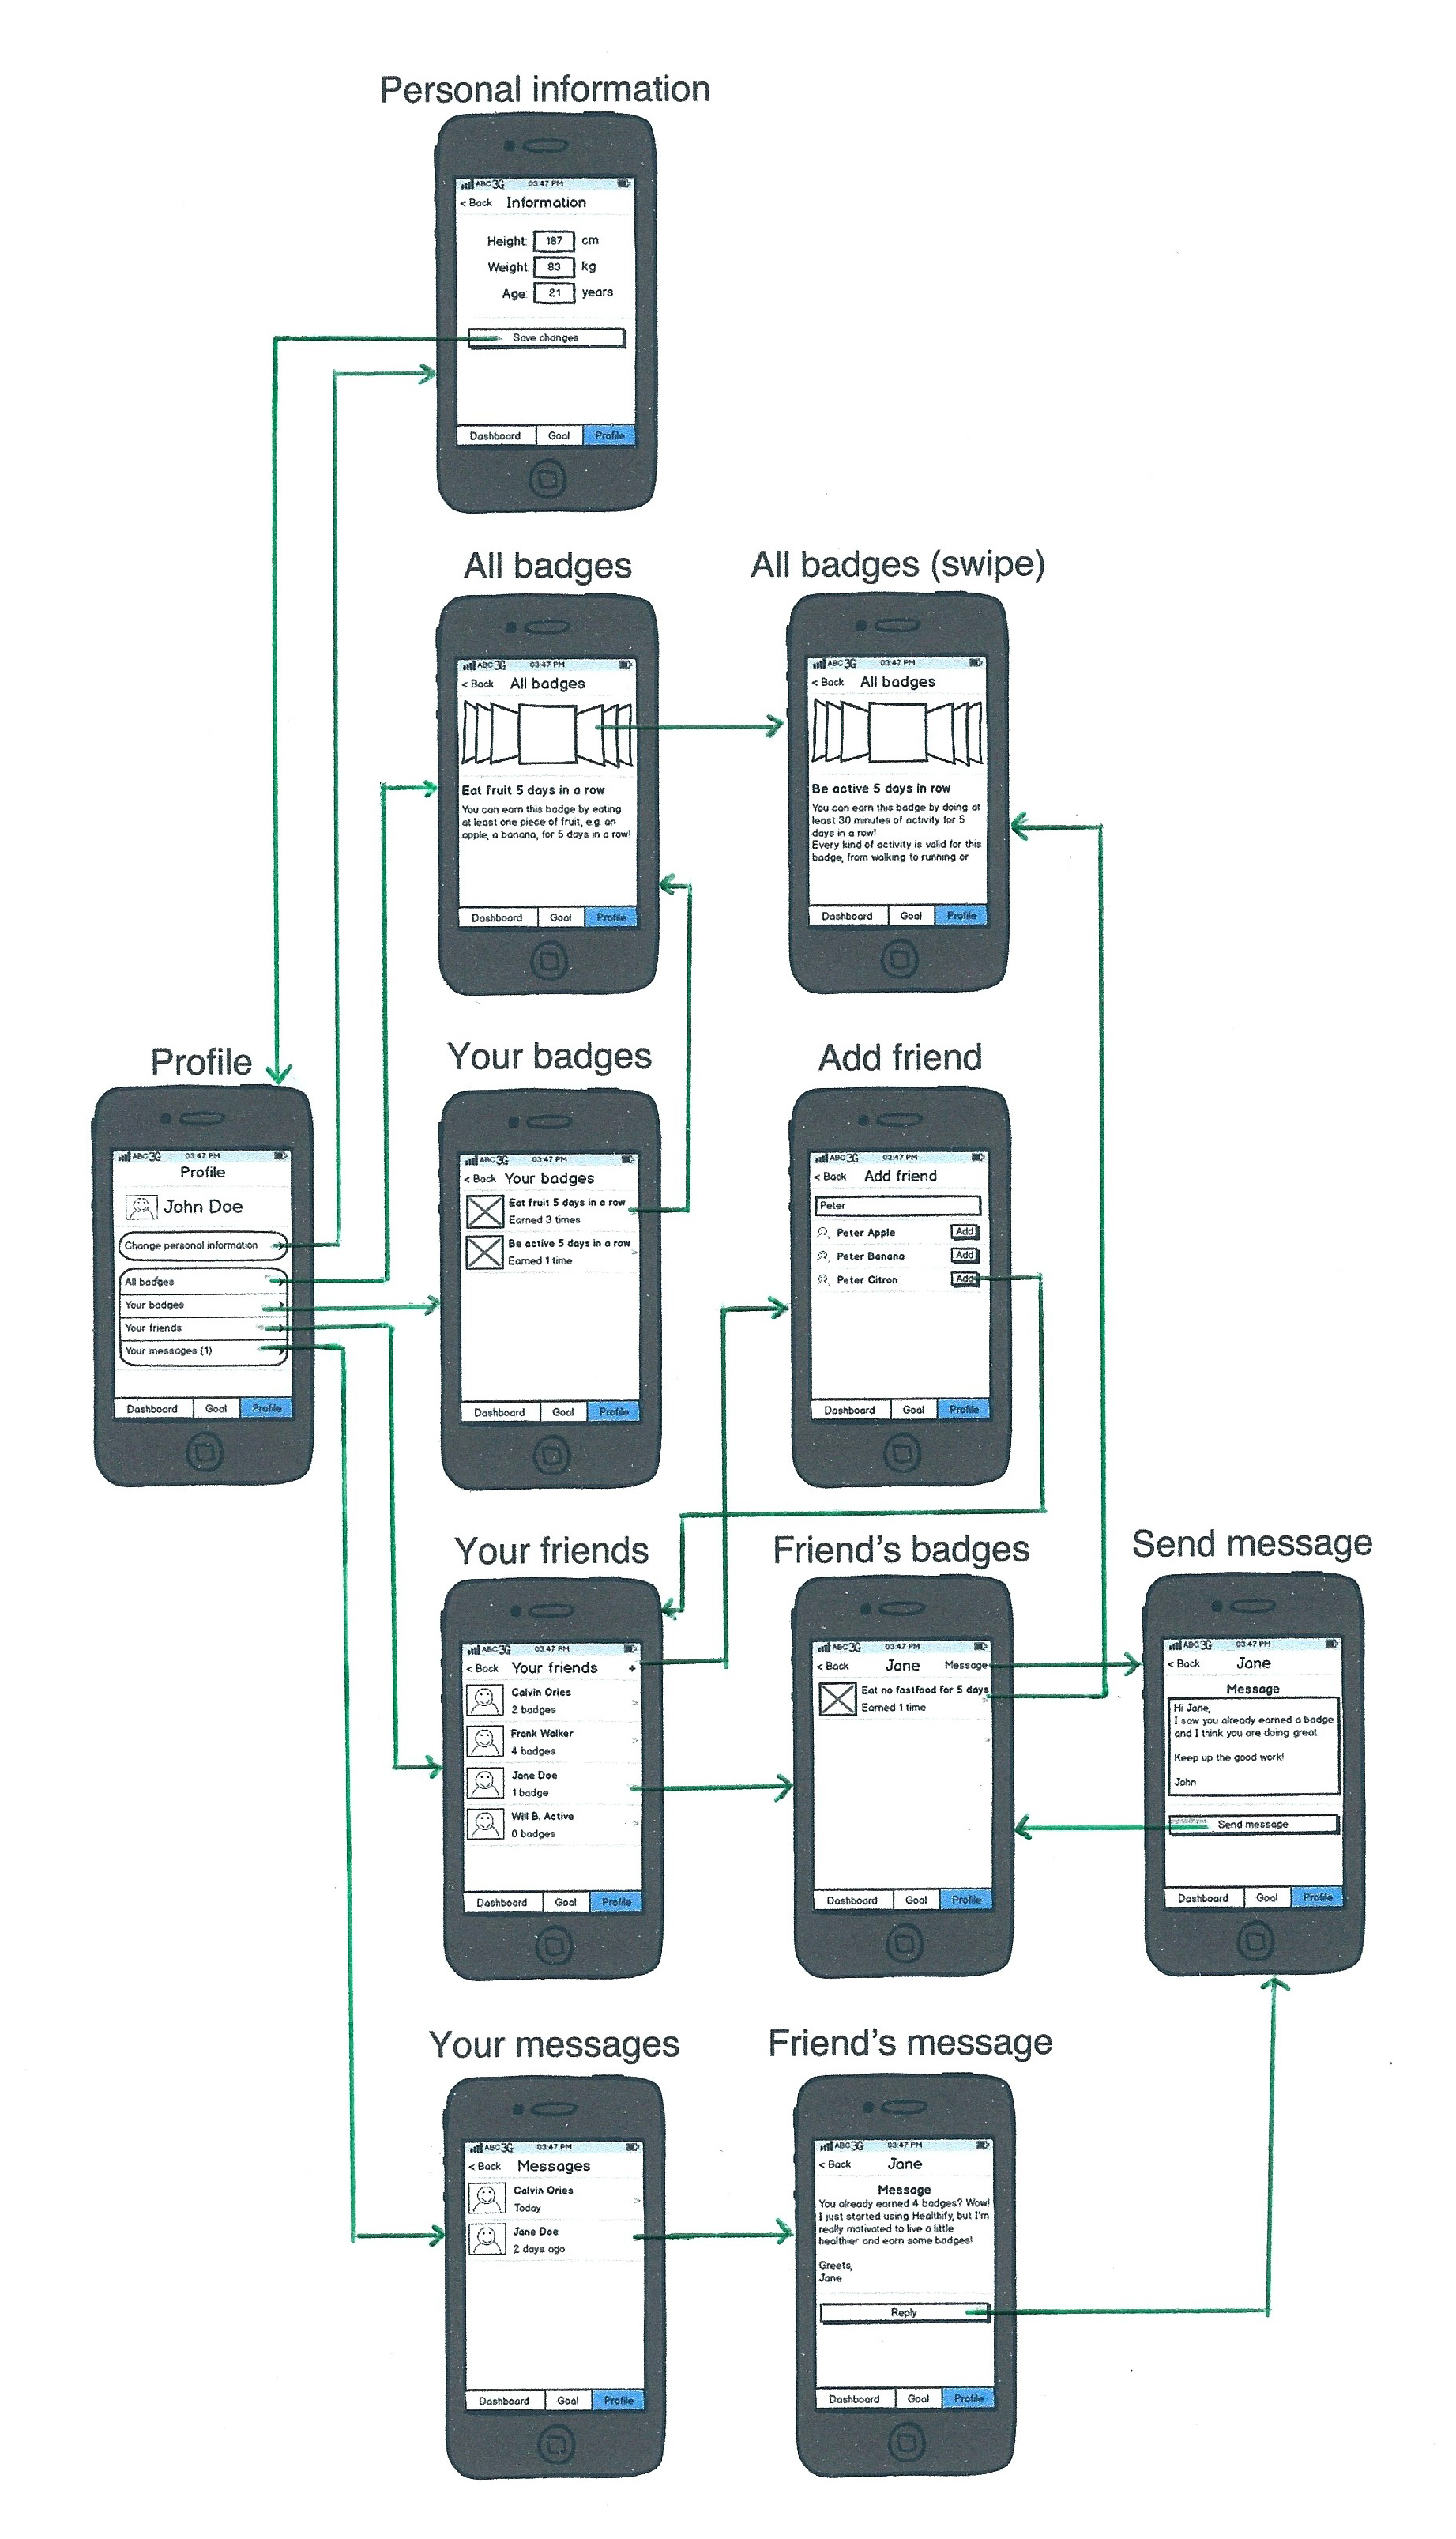 Fig.: Examples of SSQ in combination with the drawings of screens (link)
Note: It is no longer needed to describe each connection between the screens, because it is clear from the screen image what action happend, aka what caused the switch between the screens.
Task: Voluntary: Edit SSQ created in step 1 so it contains drawing of screens designed in step 2.
Resources
- Lecture 3, pages 47-53.
- Generalizing WYSIWYT Visual Testing to Screen Transition Languages, D. Brown, M. Brunett, G. Rothermel, H. Fujita, F. Negoro, 2003, link, page 3.
- Suggestions on screen transition diagram development for web system (And how to create effective test cases), Takashi Otomo, 2009, link.
- Manually drawn paper prototype testing example: video.
- Paper prototyping tutorial: video.
- How to prototype websites on paper: link.
- Death pixel to perfect design! Jason Cranford Teague, Web Visions PDX, 2013, link.
- Example of templates for creation of paper prototypesUi Stencils.
- Simple SSQ of user interface for article sharing: link
- Prototyping with Microsoft PowerPoint tutorial
- Prototyping with Pidoco tutorial
- Prototyping with Balsamiq Mockups - tutorial
- Prototyping with JustInMind - tutorial