Motivation
The situation is truly critical. At times it looked as though Ripley would be overcome by the traps of the object-oriented world, but only thanks to your help, cadet, can we now state that she is still showing signs of life — she has sufficient energy. The mission is not yet at an end, but you have the full trust and support of the tactical and strategic team for its successful completion. Although blood does not flow through the intruders’ veins but corrosive acid, they also show signs of life, so there must be a way to defeat them. Ripley will likely have to try several weapons, not just the feminine ones, to find out what really works against those nasty creatures. First and foremost, however, her life depends on your plan for how to effectively identify all living enemies.
Manager sends greetings from the operations center.
Goals
- {observer} Practice using the Observer design pattern.
- {functional-interface} Implement your own functional interface.
- {composition} Use composition instead of inheritance ("Composition over inheritance").
- {decorator} Use the Decorator design pattern for composing actor behavior.
Instructions
Step 1: They mostly come at night... Mostly.
The operations center has obtained fresh satellite images of the colony on the planet Acheron (LV_426). Strange creatures of so far unknown and evidently alien (i.e. extraterrestrial, abbreviated E.T.) origin have been sighted in the area. These are most certainly not the cute Spielberg creatures that just want to go home. Contact with these ones will likely not be pleasant...
class diagram: Class Alien and its relationships to existing classes and interfaces.
[Alien{bg:cornsilk}]-.-^[<
Task 1.1
Prepare the map for today’s mission into the directory src/main/resources/maps/ in the project, create a new class for the scenario EscapeRoom, and within it a nested Factory class for creating actors on the map.
Properly modify the main() method so that you have in the game a scene with the new map, a configured instance of EscapeRoom.Factory as the actor factory, and EscapeRoom as the scene listener.
Task 1.2
According to the given diagram, create in the package sk.tuke.kpi.oop.game.characters the intruder class Alien.
For now, the class should have a parameterless constructor. The intruder should be represented by the sprite alien.

alien.png (sprite dimensions: 32x32, frame duration: 0.1).
Task 1.3
Modify EscapeRoom.Factory so that you can return actor objects for Ripley, the medkit, the ammo magazine, and the intruder.
Note: Open the map file and check the names and types of actors that you will need for this mission.
Task 1.4
Enable the intruders to move randomly.
Use the message topic World.ACTOR_ADDED_TOPIC to "catch" the addition of intruders into the scene and schedule their random movement using already existing actions.
Gamelib
The class World, which you use as the scene implementation, contains a Topic for added actors named ACTOR_ADDED_TOPIC. Messages are published to this topic whenever an actor is added to the scene. The given actor is also the content of the sent message.
Note: Since the scene method
sceneInitialized()is called only after the scene map has already been initialized and the actors defined in it have already been inserted into the scene, you need to subscribe to messages from the topicWorld.ACTOR_ADDED_TOPICearlier. Therefore, within the scene class, override the methodsceneCreated(), which will be called immediately after the scene is created.
Task 1.5
Verify your implementation.
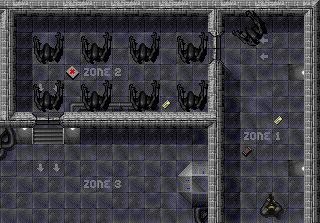
After starting the game, you should see the map of today’s mission, on which Ripley should already be placed, along with several items and running around intruders.
Step 2: Signs of (Half-)Life
The tactical and strategic team managed to break into the secret records of the classified autopsies of the intruders and, surprisingly, discovered that their existence depends on vital functions similar to those of humans. The tactical and strategic team therefore proposes that you create a class Health to represent these life functions, which will replace the current energy variables and ensure greater flexibility of the solution. Our team further suggests that you distinguish actors that show signs of life from the others through the interface Alive.

Task 2.1
In the package sk.tuke.kpi.oop.game.characters, create the class Health.
Objects of the Health class will serve to store the health value of living actors as well as to manipulate this value.
Task 2.2
Create a parameterized constructor for the class Health that expects 2 integer parameters: the initial health value and the maximum health value.
Store the values of both constructor parameters in the state of the class. Since you will need to retrieve the current health value, make it accessible via a getter method named getValue().
A common situation will be setting both constructor parameters to the same value, which will mean that the actor starts with maximum health. To simplify the use of the class in such a case, also create another parameterized constructor in the Health class with a single integer parameter, which sets both the initial and maximum health values to the same value.
Task 2.3
Add public methods refill(), restore(), drain(), and exhaust() to the class Health.
The method signatures and their meaning should be as follows:
void refill(int amount)– the method increases the health value by the amount specified by the parameter. Of course, the resulting value must not exceed the maximum value specified when the object was created.void restore()– the method sets the health value to the maximum possible value.void drain(int amount)– the method decreases the health value by the amount specified by its parameter. The resulting value must not drop below 0, which already represents a state indicating that the actor owning this health object has been completely exhausted and has died.void exhaust()– the method causes immediate complete exhaustion of health and thus sets the health value to 0.
Task 2.4
According to the above diagram, create the interface Alive in the package sk.tuke.kpi.oop.game.characters.
The interface will mark living actors and will contain the declaration of the method Health getHealth(), which returns a reference to the Health class object associated with the given actor.
Task 2.5
Modify the implementation of Ripley according to the above diagram so that it uses the new Alive interface and the Health class object.
Adjust the Ripley class so that it implements the Alive interface.
Next, ensure the creation of a Health class object in the constructor of the Ripley class. Set both the initial and maximum health values to 100.
Note: Do not forget that you no longer need the methods
getEnergy()andsetEnergy(), nor the related member variable, in the Ripley class. Also properly update all places where you have used these methods so far to use the new methods of theHealthclass object.
Task 2.6
Apply the Observer design pattern to the situation when the health value in a Health-type object of some Alive actor is depleted and reaches the value 0. Use a function accepting a so-called callback.
From the previous exercise, you should have in the setEnergy() method, in addition to setting the energy, also a test for reaching the value 0, upon which a message about Ripley’s death is sent. However, since the Health class object does not have a reference to the owning actor, you cannot move this functionality into its drain() method. Therefore, we will add a method onFatigued() to the Health class, which will allow you to register an action at the call site in the form of a block of code (a function) that will be executed at the moment when health reaches the value 0.
Note: Realize that by using a so-called callback you do not automatically implement the Observer design pattern. However, a callback can be used with this pattern in situations similar to the example described here: the block of code passed as a callback is used only at the moment when the event that is to be processed by the observer occurs.
In our case, the callback will be represented by a function without parameters and without a return value. In Java, we need to use a so-called functional interface for this purpose: an interface that has exactly one abstract method. You will create such an interface, named FatigueEffect, containing the method apply(). And since this interface will ultimately be used only in the Health class, create this interface as a nested one directly in the Health class as follows:
public class Health {
    // ...

    @FunctionalInterface
    public interface FatigueEffect {
        void apply();
    }
}
Note: Notice the
@FunctionalInterfaceannotation in the code example above. It is not necessary for functional interfaces to work, but it ensures that an error is raised if the annotated interface does not have exactly one abstract method.
So, after preparing the type for our callback, back to the new onFatigued() method that needs to be added to the Health class. This method will have the following signature:
public void onFatigued(FatigueEffect effect);
In the body of the onFatigued() method, add the object provided in the effect parameter to the list of all effects, which you will create in the Health class. Use a list so that multiple calls to the onFatigued() method can register several fatigue effects on the same Health object.
Then modify the implementation of the drain() method so that after the health value reaches 0, the apply() method is called in sequence on all registered effects.
Note: Do not forget that even in the case of calling the
exhaust()method, the actor dies and the callback functions must be called in this case as well. Implement theexhaust()method appropriately so that you avoid code duplication.
Note: In your implementation, ensure that the callbacks are triggered only the first time the health value reaches 0.
Task 2.7
Use the Health class’s onFatigued() method to configure detection of Ripley’s health dropping to the value 0 and forward the message about her death to the message bus on the scene.
Write the argument of the onFatigued() method using a lambda expression:
health.onFatigued(() -> {
    // reaction to drained health
});
Note: The lambda notation is equivalent to the following form using an anonymous class, where directly at the call site of the
onFatigued()method we implement theFatigueEffectclass with a concrete implementation of theapply()method and at the same time create an instance of it. Such code would look as follows:health.onFatigued(new Health.FatigueEffect() { @Override public void apply() { // method implementation } });
Note: When implementing Ripley’s reaction to a zero health value, the method
cancelActions(Actor actor), available on the scene, may be useful to you. With it, you can cancel all scheduled and running actions associated with the actor that you pass as the method’s argument.
Task 2.8
Generalize the Energy class so that the medkit can be used by any Alive actor, not only by Ripley.
Step 3: Know Your Enemy
In the previous step, you trained Ripley on how to take care of her health, but now the time has come for her to face her enemies. She will recognize them thanks to the Enemy interface.

Task 3.1
In the package sk.tuke.kpi.oop.game.characters, create an empty Enemy interface (a marker interface) according to the diagram above, which will make it possible to distinguish enemies. For now, the only enemy is the commonly occurring alien.
Task 3.2
Modify the Alien class so that it implements the Enemy and Alive interfaces.
Also perform all the necessary changes resulting from the implementation of the Alive interface.
Task 3.3
In the alien’s addedToScene() method, schedule draining health from every Alive actor that is not an Enemy and that comes into contact with the alien.
Task 3.4
Create the MotherAlien class for the alien queen.
This class will be an extension of the regular alien class. The alien queen will have a higher maximum and initial health value than the other aliens, for example a value of 200.
Use the mother image as the animation.
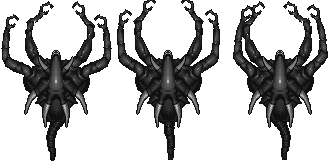
mother.png (sprite dimensions: 112x162, frame duration 0.2).
Task 3.5
Modify the factory class for creating actors so that it also creates an instance for the alien queen.
The alien queen has the name alien mother.
Step 4: Lieutenant, what do those pulse rifles fire?
Ripley can now effectively identify enemies, but that will not help her as long as she lacks an effective weapon. Although she would not complain even if we put an ordinary crowbar in her hands, long-range combat is much safer, and for that a good quality firearm is required. Before you equip Ripley with a weapon via the Armed interface, she must undergo express training in handling weapons and ammunition, which will be enabled by the abstract class Firearm and the Fireable interface.

Task 4.1
In the package sk.tuke.oop.game.weapons, create an abstract class Firearm that will define the general functionality of a firearm.
The constructor of the class will have (similarly to the Health class) 2 integer parameters: the initial number of bullets in the weapon and the maximum possible number of bullets in the weapon. For the situation where the initial and maximum number of bullets are the same, also add an overloaded constructor with a single parameter.
Task 4.2
In the Firearm class, implement the public methods getAmmo() and reload().
The method signatures and their meaning should be as follows:
int getAmmo()– the method returns the currently available number of bullets.void reload(int newAmmo)– the method increases the number of bullets in the weapon by the value defined by thenewAmmoparameter. However, the value may increase only so much that it does not exceed the maximum number of bullets in the weapon defined when it was created.
Task 4.3
In the package sk.tuke.kpi.oop.game.weapons, create the Fireable marker interface according to the diagram above.
The Fireable interface will be the contract for all actors that can serve as ammunition for a weapon.
Task 4.4
In the package sk.tuke.kpi.oop.game.weapons, create, based on the diagram above, the Bullet class representing a fired projectile.
In the startedMoving() method from the Movable interface, do not forget to set the correct rotation of the fired bullet’s animation. Set the bullet’s speed, for example, to 4.
Use the bullet file as the animation representing the bullet.

bullet.png (sprite size: 16x16).
Task 4.5
Ensure the removal of the Bullet projectile from the scene after hitting Alive actors or a wall.
After being placed into the scene, the fired bullet should start moving in the defined direction (the movement itself will be handled in one of the subsequent tasks), and if it hits any object of type Alive, it should reduce its current health value by 15. The bullet then disappears from the scene. Upon collision with walls (solid obstacles), the bullet also disappears.
While a collision with Alive actors can be detected easily using their intersects() method, detecting a collision with a wall presents a problem. Such a collision is "hidden" inside the Move action (which the Bullet class should use for movement), and it cannot be tracked outside its execute() method. Implementing the removal of Bullet objects directly in this method is not a suitable solution, because it violates the single responsibility principle and unnecessarily introduces undesirable dependencies between classes. We will solve the task of detecting wall collisions as follows, and at the same time generalize the solution for all Movable actors.
Add the method collidedWithWall() with a standard (default) empty implementation to the Movable interface:
public interface Movable extends Actor {
    // ...

    default void collidedWithWall() {}
}
This method will represent the event of hitting a wall for Movable actors. Therefore, you need to call it in the Move action when detecting a collision with a wall. By overriding this method in the Bullet class, you can then achieve the desired removal of the projectile from the scene.
Task 4.6
Add a public method fire() and a protected abstract method createBullet() to the Firearm class.
Both methods will be parameterless and their return type will be Fireable.
The createBullet() method is reserved for creating an instance of the ammunition intended for the given weapon. It will be abstract and protected because its implementation – creating a specific type of ammunition – will be provided by the concrete weapon.
The fire() method has 2 possible behaviors:
- If the weapon still contains bullets, their number is decremented and the method returns a new ammunition instance created by calling
createBullet(). - If there are no bullets left in the weapon, the method returns
null.
Task 4.7
In the package sk.tuke.kpi.oop.game.weapons, create the Gun class according to the diagram above, representing the weapon that Ripley will use.
The constructor should have two parameters corresponding to the constructor of the superclass.
The weapon will fire bullets of type Bullet.
Task 4.8
In the package sk.tuke.kpi.oop.game.characters, create the Armed interface and modify the Ripley class so that it implements it.
The Armed interface will identify actors who have a weapon (they hold a reference to an instance of a class extending Firearm) and will contain methods for getting and changing the actor’s weapon:
Firearm getFirearm()void setFirearm(Firearm weapon)
Implement this interface in the Ripley class and ensure that Ripley has a weapon (Gun) available immediately after her instance is created.
Task 4.9
Ensure that when the **SPACE** key is pressed, Ripley fires. For this purpose, implement the Fire action in the package sk.tuke.kpi.oop.game.actions and add the ShooterController controller to the package sk.tuke.kpi.oop.game.controllers.
The Fire action should be usable by actors implementing Armed and should ensure placing a new instance of the ammunition of the used weapon into the scene and scheduling its “infinite” movement in the direction of the Armed actor’s rotation using the Move action. The constructor of the action will be parameterless, since for the implementation we only need the actor on which the action is scheduled.
Note: In the implementation you will need to determine the direction of movement (
Direction) based on the actor’s rotation angle. For this purpose, create a static methodDirection fromAngle(float angle)in theDirectionenumeration, which returns the direction corresponding to the given angle.
ShooterController will have a parameterized constructor with a parameter of type Armed, representing the controlled actor. Schedule the Fire action in the keyPressed() method when the **SPACE** key is pressed.
Task 4.10
Generalize the Ammo class so that the ammo magazine can be used by any Armed actor, not only by Ripley.
Step 5: Watch your behaviour!
The main hazard for Ripley in this mission will, of course, be the aliens lurking behind closed doors. However, the event of opening a door will awaken them, which may result in chaos. To prevent the situation from getting completely out of control, your task, cadet, will be to teach groups of aliens to behave appropriately. Preserving one of the main themes of today’s mission, namely composition over inheritance, our tactical and strategic team will guide you through this part using the Decorator design pattern.

Task 5.1
Modify the Door class so that it can be used not only for vertically but also for horizontally oriented doors.
Add an enumeration type Orientation with the values HORIZONTAL and VERTICAL to the Door class, which will be used to distinguish the door orientation. Add the door orientation as a constructor parameter and, based on its value, set the correct animation (vdoor or hdoor) for the door.

vdoor.png (sprite size: 16x32, frame duration: 0.1)

hdoor.png (sprite size: 32x16, frame duration: 0.1)
Note: Do not forget to check whether the way you create a wall at the position of the closed door works correctly for both door orientations. Adjust it if necessary.
Task 5.2
Add to the doors a constructor with the signature Door(String name, Orientation orientation), in which it will be possible to define not only the orientation of the door but also their name.
Pass the door name as an argument to the superclass AbstractActor constructor.
Task 5.3
Modify the factory class so that it creates correctly oriented doors for all doors in the map.
Task 5.4
In the new package sk.tuke.kpi.oop.game.behaviours, create the Behaviour interface, which will represent a prescription for actor behaviour in the form of actions.
The interface will have:
- a type parameter (e.g.
A), which restricts for which type of actors the given behaviour is applicable, - a void method
setUp(A actor), which receives the actor as a parameter and whose task is to define the behaviour of the given actor.
Task 5.5
In the package sk.tuke.kpi.oop.game.behaviours, create the RandomlyMoving class, which will represent the behaviour of a Movable actor – it will move randomly.
Use the implementation of random alien movement, which you should already have within the scenario. Generalize the scheduled actions for an arbitrary Movable actor.
Task 5.6
Add a constructor parameter of type Behaviour to the Alien and MotherAlien classes, which will allow you to define the behaviour of a given alien.
Since we want to be able to use behaviours intended for the type Alien and all its supertypes (types from which Alien inherits, e.g. Movable, Alive, etc.), write the signature of the behaviour parameter as follows:
Behaviour<? super Alien> behaviour
Use the obtained reference to the behaviour object in the addedToScene() method, where you will call its setUp() method to configure the given alien’s behaviour.
Task 5.7
Modify the actor factory so that for an alien of type "running" you pass an instance of the RandomlyMoving behaviour.
For the other alien types, for now set the behaviour to null.
Note: Do not forget to cancel the scheduling of random movement for aliens directly in the scenario.
Task 5.8
Verify your implementation.
An alien with the type "running" should move randomly. The other aliens should remain stationary.
Task 5.9
In the behaviours package, create the Observing class, which will represent the behaviour of an actor that waits for the publication of a specific message (an object with certain properties) into a specific message topic.
This behaviour class will serve as a decorator for another behaviour.
Note: The intended usage is as follows: if an actor receives, in this behaviour, a wrapped random movement behaviour, it will first wait for the publication of a matching message and only then will the behaviour that was wrapped be applied.
Since the Observing class will be wrapping, i.e., decorating another behaviour, it will have a type parameter (e.g. A) for the type of actors for which the decorated behaviour will be created. Moreover, since it will also work with some type of message topics, it will have an additional type parameter (e.g. T) for the objects sent in messages:
public class Observing<A extends Actor, T> implements Behaviour<A> {
    // ...
}
The class will have a constructor with the following three parameters:
Topic<T> topic– the message topic that the actor will observePredicate<T> predicate– a predicate (condition) for checking the received messageBehaviour<A> delegate– the wrapped behaviour
In the setUp() method, subscribe to the message topic topic, and upon receiving a message, check the condition defined by the predicate. If the condition is satisfied, call the setUp() method of the wrapped behaviour delegate.
Note: The
Predicate<T>interface is a standard functional interface intended for testing conditions. It defines a single abstract methodtest(), whose parameter is of typeTand whose return type isboolean.
Note: The intended use of the
Observingbehaviour can be demonstrated with the following example. If we wanted to define behaviour for an alien such that after an ammo magazine is used (it is removed from the scene), it starts chasing Ripley (assuming we had a behaviour such asChasingRipleydefined for that), we would write it as follows:new Alien( new Observing<>( World.ACTOR_REMOVED_TOPIC, // waiting for message in this topic actor -> actor instanceof Ammo, // verification if magazine was removed new ChasingRipley() // passing behaviour, which was supposed to happen when prerequisite is fulfilled ) );
Task 5.10
Ensure the “awakening” of sleeping aliens after opening the door to the room in which they are located.
By awakening the aliens, we mean that they start moving randomly.
Use the created behaviour classes to define the behaviour of aliens that have the types "waiting1" and "waiting2" defined in the map. They should react to the opening of the doors named "front door" and "back door", respectively. You, of course, need to define this behaviour already when creating them in the factory class.
Task 5.11
Verify your implementation.
The aliens in the individual rooms should start moving after Ripley opens the corresponding doors.
Task 5.12
End the game when Ripley opens the door that has the name "exit door" defined in the map.
You can represent the end of the game, for example, by displaying some text (e.g. Well done!) in the game’s Overlay layer.
Additional Resources
- Java Tutorial: Anonymous Classes
- Callback: passing executable code as a function call argument, wikipedia.org
- Lambda expressions: wikipedia.org
- Observer design pattern: wikipedia.org, sourcemaking.com
- Decorator design pattern: wikipedia.org, sourcemaking.com