Motivation
New colony on planet Acheron (LV-426) is not reporting for several days even when verification of connection through satellites was successful. We fear the worst because satellite images do not detect any signs of life in the colony.
Operating center decided that thanks to your abilities we will be able to build a remotely controlled android that could deal with the situation. Our tactical and strategic team will lead you in development. The mission was named: Ellen.
To have an idea about the seriousness of the situation, we recommend you to watch documentary movies Prometheus, Alien, and Aliens.
From the operation center greets Manager.
Objectives
- Use static method
main()for starting the application - Learn to create and use your own enumeration type
- Get familiar with design pattern Observer (listener, callback)
Instructions
Step 1: Let's start from the beginning
Until now you were adding actors into a scene in your project either by using Inspector or by writing simple scenarios. However, where did the scene or Inspector come from? Why does the application window have dimensions which it has? In this step we will have a look at how to build the entire application nicely from the beginning... from function main which represents the entry point of Java applications.
Task 1.1
In package sk.tuke.kpi.oop.game create class Main.
Task 1.2
In class Main create static method main() with method signature that represents the entry point of application in Java.
Method, which can be set to be the first one called when starting an application, has to have the following signature in the Java language:
public static void main(String[] args) {

}
Task 1.3
Modify Gradle configuration for executing new main() method.
In file build.gradle.kts change value of variable mainClassName in block application to the full name of recently created Main class which contains static method main():
application {
    mainClassName = "sk.tuke.kpi.oop.game.Main"
}
Task 1.4
In method main() create a game application, add scene into it and run the game.
To create the application we need to prepare at least 3 objects - a window configuration, the game itself, and scene displayed by the game. The following code with accompanying comments illustrates the implementation.
public static void main(String[] args) {
// setting game window: window name and its dimensions
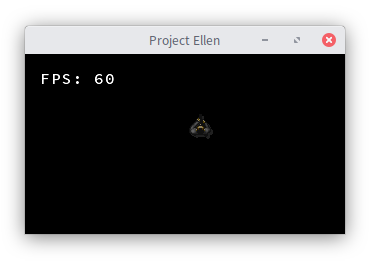
WindowSetup windowSetup = new WindowSetup("Project Ellen", 800, 600);
// creating instance of game application
// using class `GameApplication` as implementation of interface `Game`
Game game = new GameApplication(windowSetup, new LwjglBackend()); // in case of Mac OS system use "new Lwjgl2Backend()" as the second parameter
// creating scene for game
// using class `World` as implementation of interface `Scene`
Scene scene = new World("world");
// adding scene into the game
game.addScene(scene);
// running the game
game.start();
}
Warning
In case you use operating system Mac OS, the second parameter of constructor GameApplication will be an object of class Lwjgl2Backend.
Task 1.5
Ensure that after pressing **ESCAPE** key on keyboard the game application will exit.
Firstly, we can correctly end the game from code by calling method stop() on object of type Game which we can obtain from scene by using method getGame().
Gamelib
To obtain the object of class Input thanks to which we can work with input devices (e.g. keyboard), we have method getInput() available on the game object and also on the scene object. In both cases we get the same type of object (Input). The difference is, however, in the types of input events they can process:
Inputobject retrieved from the game object (game.getInput()) processes input event globally, for every scene of the game.Inputobject retrieved from the scene object (scene.getInput()) processes input events for the particular scene. We can use this separation if our game contains multiple scenes that need to react differently for the same input.
There are several options how to react on keyboard's key pressed:
- we will permanently (e.g. in scope of some repeating action) check whether desired key was pressed by using method
isKeyPressed(), or - we will setup a so-called callback in form of lambda passed to method
onKeyPressed(), which is called by game library every time a specific key is pressed.
We will use the second option with callback. Because we want to exit the application with the ESCAPE key regardless of the active scene, we will use the game's Input object. The solution may look like this:
game.getInput().onKeyPressed(Input.Key.ESCAPE, () -> game.stop());
Or equivalently with a reference to parameter-less method:
game.getInput().onKeyPressed(Input.Key.ESCAPE, game::stop);
Task 1.6
In new package sk.tuke.kpi.oop.game.scenarios prepare new class for writing a scenario.
You can call the class e.g. FirstSteps.
This time, the class of scenario will directly implement interface SceneListener from library. In the class, override method sceneInitialized() from interface SceneListener - you will soon write scenario into this method. As before, you can organise individual parts of the scenario into more methods.
Comment
Move class Gameplay, into which you wrote scenario in previous labs, to package scenarios and rename it to TrainingGameplay.
Gamelib
Abstract class Scenario, which class Gameplay extended, also implemented interface SceneListener.
Task 1.7
Add class for scenario as listener on the scene created in method main().
In method main() of class Main create instance of scenario's class and add it to created scene by using method addListener().
Comment
All changes regarding scene have to be made before calling method game.start()! Any code written after the call to this method will not be executed until we call game.stop() from within the game.
Task 1.8
Verify correctness of your implementation.
If you proceeded correctly, after running the application by Gradle task run (the same way of execution as you used before) an empty window will show up, bearing the name which you entered in constructor of WindowSetup.
Notice, that the window with Inspector is not showing up anymore.
Comment
You will not need the tool Inspector any longer, since we can replace it more than enough by scenario and debugger in development environment. However, if you would, for some reason, desire to have the Inspector available nevertheless, it is necessary to do the following:
- in file
build.gradle.ktsadd the following line into thedependenciesblock:
implementation("sk.tuke.kpi.gamelib:gamelib-inspector:$gamelibVersion")
- load changed Gradle configuration (icon Load Gradle Changes, which will show up in the upper right corner of the editor in the IntelliJ IDEA)
- wrap basic scene into
InspectableScenewhen creating the game, which serves as its decorator - extends scene's functionality with Inspector. Afterwards, you will use this scene in the game:
Scene scene = new InspectableScene(new World("world"), List.of("sk.tuke.kpi"));
game.addScene(scene);
The second argument of InspectableScene constructor is a list of names of packages in which Inspector should look for classes that it will display (they have to be annotated by @Inspectable annotation). The presented notation uses static method of() which is a so-called factory method on interface of collection List, that will construct immutable list containing entered elements (in this case one string "sk.tuke.kpi").
Step 2: Ripley is back!
The character of basic player that was available up to now is no longer shown in new scene. In his stead you will create our own main character of the game: Ripley. And you will teach her step by step.

Ripley implementing interface Actor.Task 2.1
In new package sk.tuke.kpi.oop.game.characters create class Ripley which will inherit from class AbstractActor.
In the class create parameterless constructor in which you:
- call constructor of superclass and pass it the name of actor as argument: Ellen,
- set animation with image named player and with play mode
LOOP_PINGPONG.

player.png (sprite dimensions: 32x32, frame duration: 0.1). At first glance it may seem that it is a man, but do not let yourself be fooled - it is indeed Ellen Ripley.
Task 2.2
In prepared class of scenario create instance of Ripley and place her into the scene.
Adding an actor into the scene should be performed by method addActor(Actor actor, int x, int y) by using which you can also define a position where Ripley should be placed. The view on displayed scene will be centred on the position [0, 0] (until we set it otherwise), so this position will be in the middle of the application window.
Task 2.3
Verify correctness of your implementation.
With correct implementation, after you start the game, empty world will be shown, in the middle of which Ripley will show up on defined position.
Step 3: First Steps with Ellen Ripley
Right now, Ripley can just nervously shuffle on the spot. However, it is about to change soon.

Task 3.1
Create enumeration (enum) type Direction in which you define 4 possible directions of actor's movement.
Define 4 directions: NORTH, EAST, SOUTH and WEST.
In enum type Direction add private and final integer instance variables dx and dy which will represent changes of position in x and y axes, necessary for movement in given direction. Initialise the variables in constructor Direction(int dx, int dy) and add getter methods for them.
Comment
Definition of direction NORTH will be written as NORTH(0, 1). Other directions will be written analogically.
Task 3.2
Into enumeration Direction add method float getAngle() which will return an angle (in degrees) corresponding to given direction.
Task 3.3
Create interface Movable which will represent actors that have the ability to move.
Movable will extend interface Actor and will contain these methods:
int getSpeed()for obtaining speed of actor's movement.void startedMoving(Direction direction)as listener for the event of movement started in givendirection.void stoppedMoving()as listener for the event of stopped movement.
Add empty default implementation to methods startedMoving() and stoppedMoving() in the interface, so that it will not be necessary to implement them in each and every Movable actor, unless that actor requires it.
Default implementation of method stoppedMoving() in the interface will look like this:
default void stoppedMoving() {}
Task 3.4
Modify class Ripley so that it will implement interface Movable.
Set Ripley's speed to, for example, value 2. In method startedMoving() rotate animation to direction of movement and play it. In method stoppedMoving pause the animation.
Task 3.5
In package sk.tuke.kpi.oop.game.actions create action Move which will represent movement of actor in given direction during given amount of time.
Use directly interface Action from library sk.tuke.kpi.gamelib.actions for your implementation. Action will have its own type parameter bound to type Movable, because we want to restrict applicability of the action to actors that can move (they implement Movable).
Its constructor will have parameters defining direction of movement and duration of movement in seconds.
public Move(Direction direction, float duration) {
    // implementation of actor's constructor
}
Add also overloaded constructor with only one parameter of type Direction. In this case we will consider duration as zero, which will mean actor's movement in only one step without repetitions.
Task 3.6
In action Move implement methods getActor(), setActor(), isDone() and reset() from interface Action.
Purpose of these methods is as follows:
getActor()andsetActor()serve as getter and setter for actor which executes given action. It is set by scene when action is scheduled.isDone()represents ending of action. After action is initialised this method should returnfalsefor methodexecute()to be executed at least one time. Since actionMovemay take some time to finish, this method should returntrueonly after defined time elapses. You will deal with change of the state in next task.reset()method will restore action's state (excluding actor that was set) into initial state as after action creation.
Task 3.7
In action Move implement method execute() from interface Action.
In scope of method execute() implement the following:
- In case this method is invoked for the first time, call method
startedMoving()on actor executing the action. - Update actor's position with regards to direction and speed of movement (you will obtain it by method
getSpeed()). - If total time of action's execution exceeds or is equal to time defined at action instantiation, end the action. It means that until that moment, method
isDone()has to return valuefalse. Also, do not forget to call methodstoppedMoving()on moving actor.
Comment
Time that has elapsed between two calls of method execute() is available in parameter deltaTime of method execute().
Comment
To evaluate equality of action's elapsed time and defined duration of action, consider that there are discrepancies in binary representation of floating-point numbers due to which two numbers can be almost equal but not entirely equal. Therefore, evaluation of equality should be implemented as comparison of absolute value from difference of compared numbers to value sufficiently close to 0, e.g. 1e-5.
Task 3.8
Verify correctness of movement's implementation by scheduling action Move for Ripley in your scenario.
With correct implementation, Ripley should move in defined direction during defined amount of time, while her animation should play only during her movement.
Step 4: Mission Controller
Ripley now knows how to move, but only according to predefined scenario. However, that will not suffice face-to-face with enemies - we need something more flexible. In this step we will take a look at how to navigate Ripley in real time by using keyboard.

Controller for controlling actors' movement.Task 4.1
In the new package sk.tuke.kpi.oop.game.controllers create class MovableController which will represent controller for actor's movement through keyboard.
Class MovableController should implement interface KeyboardListener from game library. This interface contains methods that, in style of design pattern observer, serve as listener functions called by library when a change of pressed keys on keyboard occurs. Thus, we can react to pressed (and released) keys by implementing these methods.
Create constructor in the class which accepts reference to Movable actor in its parameter which movement it will control.
Task 4.2
Create instance variable for mapping (Map) which will allow to "translate" one of four arrow keys (up, left, down, right) into one of four base directions of enumeration Direction.
Instance variable will be of type Map<Input.Key, Direction> - a mapping where key is keyboard's key and value will be direction of movement. By using method get() that accepts key (Input.Key) we obtain respective value (Direction).
Comment
An alternative to such translation from key to direction would be branching by if and else, or switch. However, using mapping is more object-oriented approach, so we will use this.
Mapping has to be "filled" by pairs key-direction. This initialisation can be implemented either by using method put() on object of mapping, or by factory method Map.ofEntries(), to which you provide 4 parameters created by function call Map.entry() with pairs of values comprising keyboard key and direction of movement:
private Map<Input.Key, Direction> keyDirectionMap = Map.ofEntries(
    Map.entry(Input.Key.UP, Direction.NORTH),
    // another entries of mapping ...
);
Task 4.3
Add instance variable for storing reference to action of movement Move.
In this instance variable you will hold reference to last created action Move, so that you will be able to cancel it in case direction of actor's movement changes.
Task 4.4
Modify implementation of Move so that it will provide public method stop() which will enable to stop executing movement at any moment.
Remember that to stop the action it is necessary to change its state returned by method isDone() to true and since we work with Movable actor, it is necessary to call its method stoppedMoving()!
Comment
Refactor the existing implementation to avoid duplication of functionality.
Task 4.5
Implement method keyPressed() from interface KeyboardListener which represents listener of keyboard key pressing events.
In the method check if the key pressed is one of four arrow keys. If yes, schedule movement of controlled actor in corresponding direction for maximal time possible. Remember to store reference on created action.
Comment
Here you can use method containsKey() on object of Map in which you stored translations of keys to directions in order to check key pressed.
Comment
Consider also that previous action (if such exists) needs to be stopped by calling its method stop() before creating new action for movement.
Task 4.6
Implement method keyReleased() from interface KeyboardListener which represents listener of keyboard key releasing events.
The procedure with this method will be analogical: check if it concerns key of interest and if yes, stop currently executed movement (if there is some).
Comment
Modify implementation of methods keyPressed() and keyReleased() to avoid duplication of functionality.
Task 4.7
In your scenario create instance of recently implemented MovableController, pass reference to Ripley to it and set it as listener for processing input.
Registration of input listener is realised by method registerListener() on object Input which you obtain from scene by method getInput().
Task 4.8
Verify correctness of your implementation: Ripley's movement should be controllable by keyboard.
Step 5: Repository
Task 5.1
Upload (commit and push) your source code to your GitLab repository. You should do it before the following exercise. Also, prepare questions that you want to discuss on the following exercise.
Upload your implementation even if it's not yet complete. We recommend to comment out parts of the code that could cause compilation errors.
Additional Tasks
For additional tasks, extend implementation of movement with diagonal directions.
Comment
Additional tasks will be tested in isolation for the second assignment. It means that you will not lose points for the main tasks if you do not complete these tasks. The following labs will not depend on these tasks.
Task A.1
Extend implementation of Direction with diagonal directions of movement.
Add 4 diagonal directions of movement to enumeration type values.
Task A.2
Into enumeration Direction add also direction NONE representing no particular direction of movement (standing on the spot).
Values of dx and dy for direction NONE should be set to 0.
Comment
If we do not defined NONE direction, we will have to somehow represent standing, e.g. with null. But then we would have to check for the null direction everywhere to avoid NullPointerException. If we instead systematically never assign null value to any direction, we can avoid this.
We will use direction NONE in the sense of design pattern null object.
Task A.3
In enumeration type Direction add method combine() which will enable to combine any 2 directions of movement into one.
Method's signature should be public Direction combine(Direction other). It should return direction NONE in case that it will be impossible to find proper combined direction (which should not happen under usual circumstances).
Comment
When solving this task, avoid usage of switch statement or extensive branching by if-else. Use method values() (Direction.values()), available on each enumeration type, which returns array of all possible values of enumeration.
Task A.4
Modify implementation of MovableController to make possible controlling actors also in diagonal direction of movement when 2 arrow keys are pressed (maybe even more...).
To solve this task, in MovableController you will store a set (Set) of base movement directions which correspond to all currently pressed arrow keys. To determine resulting direction of movement use method combine() on Direction with which you gradually combine directions into one.
Verify your implementation by trying to control Ripley's movement in various directions.
Additional links
- Who is Ellen Ripley
- Callback: passing executable code as argument of function call, wikipedia.org
- Java Tutorial: Enum type
- Design pattern Observer
- Design pattern Null Object
- Design pattern Factory Method