Objectives
- Familiarize with the importance and types of exceptions in the Java language.
- Learn to create and use programmer-defined exception classes.
- Learn to create unit tests for an application using NetBeans IDE.
Introduction
-
Your task on today's exercise is to familiarize yourself with the importance of exceptions
and try their use out.
We'll also learn how to create unit tests for our applications.
Instructions
-
Use exceptions when processing the user input.Task: Add the class
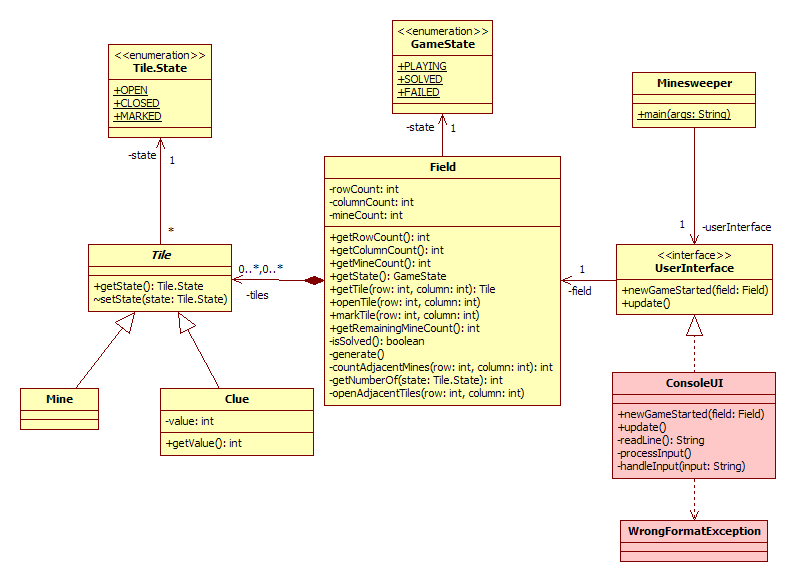
WrongFormatExceptioninto theminesweeper.consoleuipackage. This class defines an exception indicating wrong input format. The source code of this class can be found in WrongFormatException.java.Task: In theConsoleUIclass implement a private methodvoid handleInput(String input) throws WrongFormatException, which ensures processing of the input string. Move the existing input string processing from thevoid processInput()method body into the newhandleInputmethod. In case of incorrect format of the entered string the method throws aWrongFormatException.Task: Into thevoid processInput()method insert thevoid handleInput(String input) throws WrongFormatExceptionmethod call. Use thetry { ... } catch (WrongFormatException ex) {...}statement to chatch the exception and to process it (printingex.getMessage()into console). -
In the Minesweeper game, usually the number of unmarked mines is displayed. The number of unmarked tiles is defined as the number of all mines in the playing field minus the number of marks (for marking mines). The following step is thus to add this support into the game.Task: Add the functionality for displaying the number of unmarked mines into the
update()v triedeConsoleUImethod. To get the number of unmarked mines implement a public methodint getRemainingMineCount()in theFieldclass. -
During the creation of program systems there is usually a requirement for testing of functional parts and also testing of integration of these parts To test programs in the NetBeans environment, it is possible to use a tool with the support for automatic generation and running of JUnit tests. The goal is to create tests for testing playing field generation and ensure the state of the playing field are correct at all times. To use the tool for automatic test prototype generation for fields of a selected class in NetBeans IDE and run them follow the steps below.
-
In the „Projects” tab select „Tools > Create JUnit Tests” in the context menu
under the
Field.javafile name. . - In the „Select JUnit Version” dialog select „JUnit 4.x”.
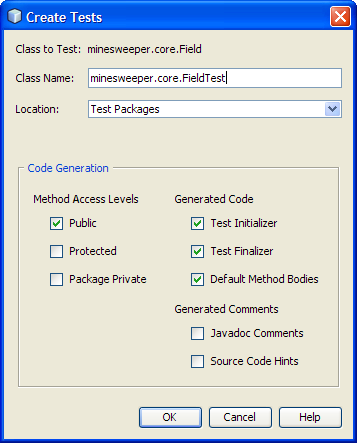
- The following window will appear with the possibility of choosing the methods based on their visibility, optional generation of code with a possibility to generate documentation comments.
-
Based on the chosen possibilities, a test file with the set of testing methods is generated.
In case you want to test a more complex part than just one method of the
Fieldclass, simply delete the unfit generated testing methods or modify the names of the methods. The created testing file will be placed in the „Test Packages” part, visible in the „Projects” tab of theMinesweeperproject. -
To run a test, the following options are possible:
- In the context menu above the project tab, select the „Test Project” option.
- In the main menu select „Run > Test "Minesweeper"”.
Task: Generate a testing fileIn the newFieldTestfor theFieldclass.FieldTest, define the following private constants:-
The number of playing field rows:
static final int ROWS = 9; -
The number of playing field columns:
static final int COLUMNS = 9; -
The number of mines in the playing field:
static final int MINES = 10;
-
In the „Projects” tab select „Tools > Create JUnit Tests” in the context menu
under the
-
Copy the below stated method implementation
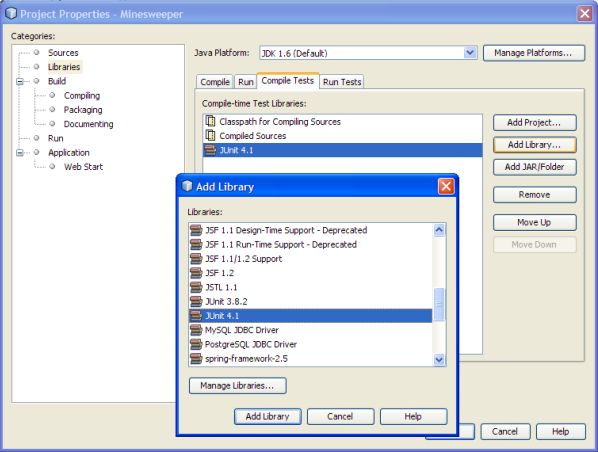
void isSolved()into theFieldTestclass of the Minesweeper project.@Test public void isSolved() { Field field = new Field(ROWS, COLUMNS, MINES); assertEquals(GameState.PLAYING, field.getState()); int open = 0; for(int row = 0; row < field.getRowCount(); row++) { for(int column = 0; column < field.getColumnCount(); column++) { if(field.getTile(row, column) instanceof Clue) { field.openTile(row, column); open++; } if(field.getRowCount() * field.getColumnCount() - open == field.getMineCount()) { assertEquals(GameState.SOLVED, field.getState()); } else { assertNotSame(GameState.FAILED, field.getState()); } } } assertEquals(GameState.SOLVED, field.getState()); }Note: Ensure that in the file import part the static importimport static org.junit.Assert.*;and import for annotation@Teststated as followsimport org.junit.Test;are listed.Note: Don't forget, that every testing method must be preceeded by the@Testannotation.Note: In case you didn't choose JUnit 4.x before, it is possible to add it to the project now. In the „Projects” tab above the project select the „Properties” option in the context menu.This method tests the implementation of successful game solving verification. In the first step, it is necessary to create an objectfieldof typeFieldto be able to work with the playing field. This way we also initialize the starting game state. We test the following requirements on the playing field:-
After creating the playing field, it has to be in the playing state -
GameState.PLAYING. For this type of test we will use the expressionassertEquals(GameState.PLAYING, field.getState()). -
After opening any tiles of type
Clueit is necessary to test the game state for successful game completion. If holds: počet všetkých dlaždíc - počet odokrytých dlaždíc = počet mín then the game must be in the state of successfully solved. To test the successful completion of the game we will use the expressionassertEquals(GameState.SOLVED, field.getState()). -
After opening any tile of type
Clueit is necessary to test the unsuccessful game completion. For this typ of test we use the expressionassertNotSame(GameState.FAILED, field.getState()). -
After opening all tiles of type
Clue, the game must be in the solved state. For this type of test we use the expressionassertEquals(GameState.SOLVED, field.getState()).
Task: Run the test for the Minesweeper project. -
After creating the playing field, it has to be in the playing state -
-
The next of possible tests is to verify the correct playing field generation (class
Field). It is necessary to test the following requirements on the playing field:-
The number of rows, columns and mines in the playing field corresponds with the specified values:
assertEquals(ROWS, field.getRowCount()),assertEquals(COLUMNS, field.getColumnCount()),assertEquals(MINES, field.getMineCount()). -
Every item of the playing field must be represented by a tile and must not be equal to
null. For every item of the plyaing field, we need to test the expressionassertNotNull(field.getTile(row, column)), where thefieldvariable is an object of the playing field of typeField. -
The number of generated types of type
Minemust be equal to the required mine count. For the purpose of testing, it is necessary to get the number of tiles of typeMinein the playing field (for example, into amineCountvariable) and apply testassertEquals(MINES, mineCount). -
The number of generated tiles of type
Cluemust be equal to number of all tiles - number of mines. For the purpose of test, it is necessary to get the number of tiles of typeCluein the playing field (for example, into aclueCountvariable) and apply testassertEquals(ROWS * COLUMNS - MINES, clueCount).
Task: Add a public methodvoid generate()into theFieldTesttesting class. Implement it according to the requirements in this step. Verify the correctness of the field generation via this test. -
The number of rows, columns and mines in the playing field corresponds with the specified values:
Resources
- Source codes:


int getRemainingMineCount()use the methodint getNumberOf(Tile.State state)of classFieldimplemented in exercise 5, which returns the number of tiles in the required state.