Motivation
Cadet! Only the last training mission separates you from the rank Trainee. Mastering it is very important for your survival in the world of OOP! First we will show you how to prepare for work without inspector. And - what is outstandingly important - we will get to another side of polymorphism, which is a way to make an agreement with certain group of types of objects when you teach them to understand a common interface.
In today's mission, our tactical and strategic team prepared two goals aimed at principles of OOP and one practical goal which is refactoring. We all hope that you will show your abilities that you gained during the training and so you will be ready for operations in the field.
Good luck with achieving goals! From the operation center greets Manager.
Objectives
- Interfaces
- Polymorphism
- Refactoring
Instructions
Step 1: Lather, Rinse, Repeat
Surely you noticed that for checking correctness of your progress when solving missions you need to repeat more and more operations after launching the application: creating required objects and connections between them, checking behaviour after calling methods. Alongside tediousness of the whole procedure there is also a risk that in real world without inspector you will find your way with problems. With a goal to avoid this situation we will now introduce means how to create scenarios for testing the mission directly in the code.
Task 1.1
In package sk.tuke.kpi.oop.game create class Gameplay which will inherit from class Scenario that is available from game library, and override its abstract method setupPlay(Scene).
In the next tasks you will add actors to scene and plan actions for them from within this method. Effectively, you will write a scenario.
Gamelib
The library searches for implementation of class Scenario when the application is launched and registers it as so-called listener (or event handler) on scene. A method setupPlay() prepared in advance is called after a map and actors defined in it are initialised in the scene - for now it is only the player (Player).
Task 1.2
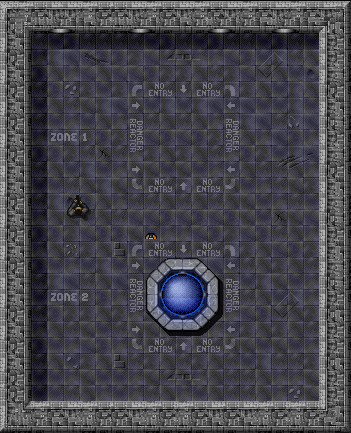
In scenario, add reactor into the scene and turn it on.
To add new actor into the scene you need to create instance of that actor (or already have one available) and place it into the scene on some position (i.e. define placement of bottom left corner of actor's animation relative to bottom left corner of scene's map).
Adding a reactor and turning it on can be implemented as follows:
Reactor reactor = new Reactor();
scene.addActor(reactor, 64, 64);
reactor.turnOn();
Check the implementation by running the application. Reactor should be placed on provided position and turned on right after the start.
Comment
An alternative way of specifying places where to put actors is described in additional (and optional) task A.4.
Task 1.3
Add cooler into the scene and turn it on 5 seconds after the scene starts.
You are already familiar with the action Invoke that can be used for turning a cooler on. In the game library also the action Wait is available, which accepts duration of waiting (in seconds) in its constructor. With these actions, we may try to solve the task as follows.
new Wait<>(5).scheduleFor(cooler);
new Invoke<>(cooler::turnOn).scheduleFor(cooler);
How would such scheduled actions work actually? The scene will call execute() methods of both of these actions before rendering each new frame. This means that the scheduled actions are executed concurrently. In this specific case we will not have the cooler turning on after the action Wait (that will take 5 seconds) finishes. Instead, the cooled will be turned on just after starting the application.
Comment
There is almost no time spent between lines new Wait... and new Invoke.... These commands execute almost immediately, as they describe only creation of new action objects and their scheduling on the scene. Their actual execution happens later in the scene, as described in documentation of the game loop.
To solve this task, we need to ensure that the action for turning on the cooler is executed after the wait. To chain execution of multiple actions into a sequence we can use another library action - ActionSequence. This action takes a variable number of other actions as consturctor arguments and makes them execute sequentially. And we will schedule just this sequential action, not the wrapped actions.
new ActionSequence<>(
    new Wait<>(5),
    new Invoke<>(cooler::turnOn)
).scheduleFor(cooler);
Task 1.4
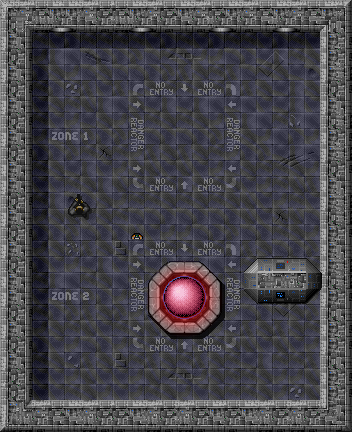
By using existing actions, write down a scenario for repairing damaged reactor with hammer.
To solve this task the action requires method repairWith() from reactor. This method expects one argument - a hammer. This allows us to showcase another way of specifying actions: as anonymous classes or lambda expressions.
Up until now you used the Invoke action with references to parameter-less methods. The actual signature of Invoke's constructor is:
public Invoke(Runnable action)
Runnable is a standard Java interface that specifies single method void run(). In combination with anonymous classes - classes written inside expressions where they are also instantiated in place - we could write the action for repairing reactor with hammer as:
new Invoke<>(new Runnable() {
    public void run() {
        reactor.repairWith(hammer);
    }
});
This code will produce an object of type Runnable with the given implementation of its run() method, which is given as argument to the Invoke constructor. This action then calls the run() method of the given object in its execute() method.
The notation of anonymous classes is quite noisy, given that we wanted to implement just one method. But as the Runnable interface is a functional interface - i.e. it defines single abstract method - we can shorten the code by writing it as lambda expression:
new Invoke<>(() -> {
    reactor.repairWith(hammer);
});
The result is same as in the previous example. The code produces a Runnable object (based on the type of Invoke's constructor parameter) with the run() method for which we gave the implementation.
For solving the other part of the task where we need to detect a moment when reactor's temperature reaches given value, we can use action When. Its first argument is a simple predicate, which an object of type Supplier<Boolean> with single abstract method boolean get() (this object can also be written as a lambda expression). The predicate is tested repeatedly and the first time it returns true, the action specified as the second argument to When's constructor is executed.
We can thus implement the required action as follows:
new When<>(
    () -> {
        return reactor.getTemperature() >= 3000;
    },
    new Invoke<>(() -> {
        reactor.repairWith(hammer);
    })
).scheduleFor(reactor);
And because the bodies of both lambda expressions are just single expressions, Java allows us to shorten the code even further:
new When<>(
    () -> reactor.getTemperature() >= 3000,
    new Invoke<>(() -> reactor.repairWith(hammer))
).scheduleFor(reactor);
Task 1.5
Write down your own scenario in which you model behaviour of several actors connected to each other.
Try to minimise usage of inspector by writing down several use cases of existing actors.
Comment
Make use of writing down actor's behaviour into scenario also in tasks that follow. Sectionalise the scenario into methods that model individual use cases. Then, in method setupPlay(), just specify the method which you want to use.
Step 2: Switchable
Up to now we could control only one type of devices (objects) with a switch. This time you will try to "persuade" and "make an agreement" also with other objects to control them. It is all just a question of what agreement in form of interface you offer them.

Switchable.Task 2.1
In package sk.tuke.kpi.oop.game create interface Switchable.
Signatures of methods in this interface and their meaning are as follows:
void turnOn()- method will turn on controlled devicevoid turnOff()- method will turn off controlled deviceboolean isOn()- method will return value representing state of device (true - device is turned on, false - device is turned off)
Task 2.2
Modify class Reactor so that it implements interface Switchable.
Methods that should be part of the interface are already in the class. Behaviour of method isOn() is implemented by method isRunning() so use refactoring to rename this method.
Task 2.3
Rename class Controller to PowerSwitch. It should represent a controller that can turn on and off any kind of device implementing interface Switchable.
Use the refactoring feature in development environment when renaming the class.
Modify implementation of class PowerSwitch to provide the following public methods:
getDevice()- provides a reference to connected deviceswitchOn()- turns the connected device onswitchOff()- turns the connected device off
Gamelib
To graphically distinguish switch in its off position (connected device is off) you can use method setTint() on its animation which will add colouring according to defined colour. For example, by using gray on animation its colour will seem muted:
getAnimation().setTint(Color.GRAY);
You can cancel out the tint by applying white colour.
Task 2.4
Verify correctness of your implementation by creating instance of reactor and instance of class PowerSwitch with which you will be able to turn reactor on and off.
Task 2.5
Modify classes Cooler and Light so that they implement interface Switchable.
If these classes already have implementation of required methods, just add annotation @Override to them. If they have similar methods (functionality), rename them. However, if these methods do not exist, create them.
Task 2.6
Verify correctness of your implementation.
You will check your implementation by creating instances of classes listed above and creating switch for each of them to control them.
Step 3: Producer/consumer
Right now, reactor can power only devices that are instances of class Light. Your task is to prepare a proper "standard" for powering arbitrary devices (design compatible "sockets" and "plugs").

EnergyConsumer.Task 3.1
In package sk.tuke.kpi.oop.game create interface EnergyConsumer.
Interface EnergyConsumer will have only one method. Its signature and meaning is the following:
void setPowered(boolean)- with this method, the energy supplier will notify devices about providing or not providing energy.
Task 3.2
Modify class Light so that it will implement interface EnergyConsumer.
Task 3.3
In class Reactor change methods addLight() and removeLight() into methods addDevice() and removeDevice() which will allow connecting devices that implement interface EnergyConsumer to reactor.
Task 3.4
Verify correctness of your implementation.
If you proceeded correctly the resulting functionality will not change much - light will still be the only appliance that can be connected. However, this time it will be seen by reactor not as object of type Light but as object of type EnergyConsumer.
Task 3.5
Modify class Computer so that it will implement interface EnergyConsumer.
Computer will work only in case it is powered by electricity. Otherwise it will not work (its animation will be paused and results of all calculations will be 0).
Task 3.6
Modify reactor to be able to power several devices at once.
References to objects of those devices should be stored into a set. Use the following code to create it:
// declaration of instance variable for set of connected devices
private Set<EnergyConsumer> devices;

// instantiating a set in constructor
// (type parameter for HashSet is derived based on type of variable devices)
devices = new HashSet<>();
Comment
Using set, in comparison to standard list (type List), will ensure that one specific device will not be connected to reactor more than once.
Adjust methods addDevice() and removeDevice() in class Reactor accordingly. For adding device to set use method call add() on object of set. Modify method removeDevice() to be parametric, with object in parameter being of type EnergyConsumer. To remove device from set use method call remove() in which parameter you will pass reference to specific object that should be removed from the set.
Task 3.7
Verify correctness of your implementation.
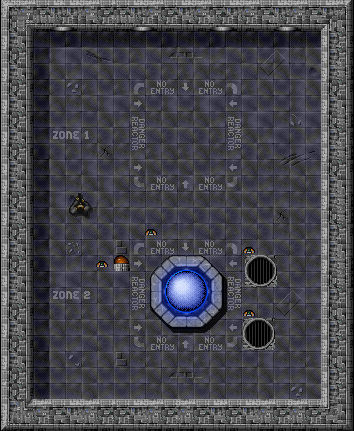
If you proceeded correctly, this time you will be able to connect to reactor not only instances of class Light but also instances of class Computer. The principle of polymorphism is manifested here by using interfaces.
Step 4: Useful generalization
As part of preparation for the real world it is surely necessary to focus on "cleaning up" the code and practising refactoring (changing the structure of already implemented code with preserved behaviour). Our case will regard generalisation of tools into usable actors and rotation of relationship between initiator of usage and used object. We will also use interface to distinguish group of actors that can be repaired.
Task 4.1
In package sk.tuke.kpi.oop.game.tools add interface Usable representing usable actors - tools.
Comment
In our current implementation of usable tools we can notice a relationship between the type of object that can be used with some other type of object (only a hammer can be used to repair a reactor). As we now want to generalize usability of actors, we can use custom type parameters to model such relationships in the type system.
Interface Usable will have a type parameter A that will be bound to subtypes of Actor:
interface Usable<A extends Actor> {
    // ...
}
Add to this interface one method with signature void useWith(A actor). Actor provided in parameter of method useWith() will serve to define the context of Usable actor's usage.
Task 4.2
Modify abstract class BreakableTool so that it will implement interface Usable and will allow to define type parameter in its specific implementations (subclasses).
Comment
BreakableTool will not substitute a specific type for the type argument of Usable interface it implements. It will have its own type parameter that will be used to pass the type specified by its subclasses up the inheritance hierarchy to the Usable interface.
Adjust method use() from the original implementation of BreakableTool so that it will override method useWith() from interface Usable. Do not forget the annotation @Override.
Task 4.3
Adjust specific implementations of class BreakableTool to be compatible with modifications from previous tasks.
By type parameter for BreakableTool specify type of actor with which specific tool can work (which it can repair; e.g. hammer can repair reactor).
In individual tools override implementation of method useWith() and perform appropriate correction.
Do not forget to modify methods for repairing reactor repairWith() and extinguishWith(), and now rename them to repair() and extinguish(), since repairing will be initiated by tools themselves (hammer and fire extinguisher). Use return value boolean with these methods to signalise success or failure of using the tool.
Task 4.4
Add interface Repairable that will represent repairable actors.
In the interface define method with signature boolean repair(). Return value will signify success or failure of the repair.
Task 4.5
Edit class Reactor to implement interface Repairable.
Task 4.6
Edit class DefectiveLight to also implement interface Repairable.
The repair of light (it will stop blinking) will last only 10 seconds, after which light breaks again.
Gamelib
Methods scheduleAction() on scene and scheduleFor() on action return object of type Disposable. Invoking method dispose() on such object will cancel scheduling or interrupt execution of action which was planned by calling given schedule* method. The possibility to cancel actions scheduled earlier will come in handy for solving this task.
Task 4.7
Create class Wrench for tool wrench which will be, similarly to hammer, usable for repairing broken devices - specifically device DefectiveLight.
Wrench should inherit from class BreakableTool and have 2 uses. Use image wrench for its graphical representation.
Step 5: Repository
Task 5.1
Upload (commit and push) your source code to your GitLab repository. You should do it before the following exercise. Also, prepare questions that you want to discuss on the following exercise.
Upload your implementation even if it's not yet complete. We recommend to comment out parts of the code that could cause compilation errors.
Additional Tasks
Task A.1
Create class TimeBomb which will represent a time bomb.
The class should contain:
- parametric constructor for setting time (in seconds; type
float) that should elapse from the moment of bomb's activation until its detonation, - public method
activate()which will serve for activation of bomb that will launch the countdown to detonation. For animation of bomb before activation use image bomb. When activated, the bomb should sparkle (use image bomb_activated). - public method
boolean isActivated()that will return value depending on whether the bomb is currently activated.
For bomb's detonation use animation small_explosion (download the image to other animations in your project). Ensure that the animation will be played only once (use appropriate playMode of animation) and the object will after that disappear from the game scene (use appropriate methods on the animation object to determine whether the animation has finished).
Comment
To implement bomb's actor removal from the scene we recommend using action [`When`](http://it4kt.cnl.sk/c/oop-gamelib/sk/tuke/kpi/gamelib/actions/When.html) together with appropriate methods that are accessible on object of [animation](http://it4kt.cnl.sk/c/oop-gamelib/sk/tuke/kpi/gamelib/graphics/Animation.html) for making sure that entire animation of detonation was already played.
The first argument of constructor for action `When` is a so-called _predicate_ - function (lambda expression) with signature `boolean test(Action action)` that obtains tested action in parameter and should return boolean value.
When predicate in `When` returns true, action defined in the second argument of constructor will be executed.
Task A.2
Create class ChainBomb as subclass of class TimeBomb. Ensure that all such bombs of type ChainBomb will be activated, which are in the distance of 50 units (and less) from the center of currently activated bomb.
Constructor of class ChainBomb will also accept time from activation to detonation in its parameter.
Realise that each consecutive explosion can cause another explosions for domino effect: at the moment of one bomb's detonation all not yet activated bombs within range will be activated.
To represent the blast radius you can use class Ellipse2D.Float from package java.awt.geom and for temporary representation of animation of other nearby actors you can use class Rectangle2D.Float (from the same package). Then you can use method intersects on the ellipse shape to detect their overlap.
Make sure throughout your implementation that you do not duplicate already implemented functionality from the ancestor, but in case of need you can refactor it.
Task A.3
Create class Teleport which will model teleporting of player between two places in the game world.
Functionality of teleport should be as follows:
- If player enters teleport A he will be immediately moved to destination - teleport B. Player enters teleport only when a point in the middle of his animation gets into the area defined by teleport's animation.
- If player was just teleported to teleport A from another teleport, he will not be teleported again to target of teleport A unless he goes out completely from the area of teleport A and returns back in.
- In case teleport A has no target teleport associated, player will not be teleported.
- Teleport A cannot have set itself as target teleport (teleport A).
Class Teleport should contain
- a constructor that enables to set target teleport through its parameter and uses image lift to set teleport's animation,
- methods
getDestination()andsetDestination(Teleport destinationTeleport)which enable to obtain reference to target teleport and to change it, - method
teleportPlayer()with which the target teleport sets new position of player while teleporting. Player should be moved so that coordinates of target teleport's center will match coordinates of center of player.
Task A.4
Use markers in map for placing actors on predefined positions.
The scene's map that we use contains several markers that can simplify placement of actors into the scene. These markers are of type MapMarker and they can be obtained from scene's map by method getMarkers():
Map<String, MapMarker> markers = scene.getMap().getMarkers();
Comment
Type Map (java.util.Map<K, V>) represents data structure map containing entries that comprise key of type K and value of type V. In the case stated above this map contains keys defined by strings (String) with names of individual markers, to which markers (MapMarker) are assigned (mapped).
Map of the scene contains several markers which names and positions are shown in the following picture.

MapMarker objects in scene's map.
Placing reactor into the scene by using markers can be implemented like this:
// obtaining reference to marker named "reactor-area-1"
MapMarker reactorArea1 = markers.get("reactor-area-1");

// placing a reactor on marker's position
scene.addActor(reactor, reactorArea1.getPosX(), reactorArea1.getPosY());
Additional links
- Actions available in GameLib library
- Java Tutorial: What Is an Interface?
- Java Tutorial: The List Interface
- Java Tutorial: List Implementations
- Java Tutorial: Lambda Expressions
- Java Tutorial: Bounded Type Parameters