Motivation
Cadet! To survive the struggle with objects in hostile world of Object-oriented programming, you need to get familiar with important feature which some objects use to mask themselves and to deceive the enemy with form of polymorphism. This feature is nothing more than inheritance!
Our tactical and strategic team prepared a training mission for you with codename Mission: Inheritance to enhance your abilities to stand in this battle. Several goals are prepared for you to help you understand objects that use this feature. After reaching the goals your chances for surviving in the world of Object-oriented programming will dramatically increase! Therefore proceed according to plan of this mission.
Good luck with achieving goals! From the operation center greets Manager.
Objectives
- Inheritance
- Overriding methods
- Polymorphism
- Using keyword super.
- Using method references.
Instructions
Step 1: Similarity (not) entirely coincidental
Cadet! Do not doubt that the origin of hammer Mjolnir is definitely extraterrestrial, and although it abounds with superhuman power, it has some common features, whether one likes it or not, with fire extinguisher. It can be used and breaks after some time. This similarity can be transformed into usage of inheritance in your implementation, which can reduce repeating code.

BreakableTool representing breakable tool.Task 1.1
Create abstract class BreakableTool which represents generalisation over any work tool that has limited amount of usages.
Generalized implementation of a tool that can wear away includes tracking the number of remaining uses (this is the state) and updating this number on each actual usage (this is the behaviour). To achieve this, add the following to the class BreakableTool:
- Instance variable
remainingUsesfor amount of remaining uses. It should be available outside the class only for reading and it should be inintialized in parametrized constructor. - Method
use()for decreasing number of tool's remainig uses and its removal from the scene once the number reaches 0 (the tool wore away and broke).
Comment
Code which you already implemented in hammer and fire extinguisher may help you.
Task 1.2
Adjust classes Hammer and FireExtinguisher to be subclasses of class BreakableTool.
Edit constructors of these classes. Now that the parent class contains only parametrized constructor, you need to call it with the help of the super keyword.
Do not forget the purpose of the generalized implementation of BreakableTool class and update implementations of Hammer and FireExtinguisher classes to maximize usage of the inherited functionality.
Task 1.3
Create new package sk.tuke.kpi.oop.game.tools and move classes relating to tools into it.
The number of classes in the project is increasing. To maintain order among them and group related classes together, create new package tools in package sk.tuke.kpi.oop.game and move class BreakableTool, Hammer, Mjolnir and also FireExtinguisher in there.
Comment
In this task you can use feature called refactoring provided by the development environment. You can move the classes to the new package by drag&drop function in the project structure panel. In this way you avoid manual rewriting of the package declaration at the beginning of source files and editing imports, as the environment can perform these changes automatically.
Step 2: Self-exploding reactor
Until now you could work with reactor only manually - you could turn it on and off, and increase and decrease its temperature by calling appropriate methods through Inspector. In this step you will make some changes to make reactor work independently. We will use a system of actions for that which will represent activity or behaviour of actor in a game scene.

Gamelib
Action, represented by the interface Action and its general implementation AbstractAction, serves in game library GameLib for encapsulating activities of actors into standalone objects. By scheduling execution of action on a scene into which actor belongs it will be (gradually) executed. Every action scheduled on a scene, which has not yet been finished, is executed by calling its method execute() before rendering the next frame of scene. With the help of actions it is possible to implement actor's behaviour with regard to the flow of time, or reactions of actor to current events in the scene.
You can find the description of the game loop in GameLib at its documentation site.
In general, each action has
- state represented by two instance variables:
actor(getter getActor()) - actor with which action is executed (the reference is set by scene at the time of scheduling the action, it may be alsonull)isDone(getter isDone()) - indicates whether the action has already finished (checked by the scene always before executing the action).
- two significant methods:
- method execute(float deltaTime) - implements the logic of the action, is executed always before rendering the new frame of the scene (max. 60 times per second) in case that the action was scheduled and is not yet done. Parameter of this method is the time (in seconds) since the last rendering of the scene.
- method reset() - enables to reset action's state.
Scheduling of an action is done by calling scheduleAction(Action action, Actor actor) method on the scene object, or by calling scheduleFor(Actor actor) helper method on the action object. All of this will be shown in the following tasks, step by step.
Task 2.1
In a new package sk.tuke.kpi.oop.game.actions create class PerpetualReactorHeating which will represent action perpetually incrementing reactor's temperature. Enable to specify value of temperature's increment when creating instance of the class in its constructor.
As you can see in the class diagram above, new class of action PerpetualReactorHeating should inherit from class AbstractAction. AbstractAction is available in the library package sk.tuke.kpi.gamelib.framework.actions.
The class AbstractAction uses type parameter A which defines the type of actor, with which the action should be possible to execute. Since the action should increase temperature of a reactor, set Reactor as its type argument:
public class PerpetualReactorHeating extends AbstractAction<Reactor> {

}
Comment
A part of the AbstractAction implementation in the library looks like this:
public abstract class AbstractAction<A extends Actor> implements Action<A> {
    private A actor;

    @Override
    public A getActor() { return actor; }

    @Override
    public void setActor(A actor) { this.actor = actor; }

    /* ... the rest of the class ... */
}
Note mainly the type parameter **A** that
- is bounded to types derived from the
Actortype (A extends Actor) - defines the type of instance variable
actor, as well as return value type ofgetActor()method and parameter type ofsetActor()method.
If we use Reactor type as the type argument for A in our implementation of PerpetualReactorHeating (which is done by notation AbstractAction<Reactor>, as given above), we achieve that, from the point of view of the PerpetualReactorHeating class, the type of actor variable, return type of getActor() method and parameter type of setActor() method will be substituted for Reactor. This gives us the following benefits:
- The action will be usable only for actors of type
Reactor, because the methodsetActor()will accept only arguments of that type - its signature from the point of view ofPerpetualReactorHeatingclass will besetActor(Reactor actor). - By calling
getActor()method we will get a reference to a object of typeReactorand not only a genericActor. This will allow us to call methods specific for reactor, e.g.,increaseTemperature(), which we will need to do in the next task.
Summarizing, similarly to the method parameters that allow us to generalize implementation for various values, type parameters allow us to generalize the implementation for various types.
Task 2.2
In class PerpetualReactorHeating override abstract method execute(float deltaTime) in which you implement functionality of the action.
When implementing method execute(), obtain reference to actor with which the action is executing (it will be some reactor) and increase its temperature by value specified as parameter of action's constructor.
Task 2.3
Schedule execution of action PerpetualReactorHeating on reactor so that its temperature will increase by 1 degree.
Since actor needs to know which scene it belongs to when scheduling an action, the right place for scheduling the action can be method addedToScene() inherited from class AbstractActor which obtains reference to scene in parameter (type Scene) and is called right after the actor was added into the scene. Therefore, it is necessary to override method addedToScene(). Do not forget, however, that we still need to execute the original implementation of method addedToScene() from class AbstractActor, and so use keyword super to call the inherited implementation!
Scene defines method scheduleAction() which receives action and actor with which the action should be later executed. Scheduling execution of action in reactor's method can look as follows:
// in method addedToScene of class Reactor
scene.scheduleAction(new PerpetualReactorHeating(1), this);
Our tactical and strategic team, however, designed also a complementary method scheduleFor() available directly on object of action, which receives object of actor and provides the same functionality as method scheduleAction() on scene, but with somewhat clearer notation:
// in method addedToScene of class Reactor
new PerpetualReactorHeating(1).scheduleFor(this);
Gamelib
The simplified implementation of the scheduleFor() method of each action is following:
Disposable scheduleFor(A actor) {
    return actor.getScene().scheduleAction(this, actor);
}
Task 2.4
Verify correctness of your implementation by starting a reactor.
If you proceeded correctly, a reactor that is turned on should gradually increase its temperature, what you can also verify by using inspector.
Step 3: How cool is cool enough?
Now when the first step towards autonomous reactor is behind us, it surely has not escaped your attention that basically only for calling one method of reactor a whole new class was created. We will try to solve this shortcoming of initial implementation one step after the other.
The adjustment made to reactor in previous step has a little catch though - by letting reactor work independently it will systematically overheat. And overheating, as we know since year 1986, will inevitably lead to its permanent damage. To avoid such situation, instead of hammers you will create a cooler which will cool reactor down systematically.

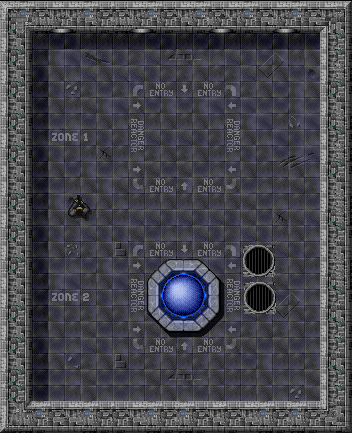
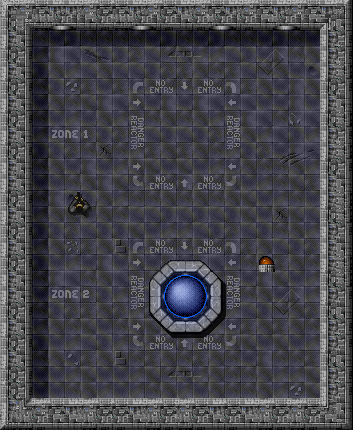
Reactor and Cooler.Task 3.1
In package sk.tuke.kpi.oop.game create class Cooler for cooling device which will ensure sufficient cooling of reactor connected to it.
Behaviour of cooler and its relationship with reactor is described by the following class diagram:
;+turnOn();+turnOff();+isOn()%5D->%5BReactor%5D.svg)
Cooler.Use file fan as animation for cooler. When cooler is turned off, pause its animation. Otherwise when cooler is turned on, play its animation. You will find appropriate methods on object of animation to control it.

fan.png (sprite dimensions: 32x32, frame duration: 0.2).
Task 3.2
Add private method into class Cooler in which you implement activity of cooler.
You can name this method e.g. coolReactor(). Every time it is called (when cooler is turned on) temperature of connected reactor should decrease by one degree.
Task 3.3
Override method addedToScene() in which you schedule action for cooler's behaviour.
For calling a method within action it is not necessary to create whole new class of action which will then serve only one very specific purpose. Instead of implementing a new action class we will use action Invoke (available from GameLib library), with which we can define activity of an action (method execute()) also by reference to the method that implements the required behaviour.
Comment
Reference to a method with name method of a specific object object has the notation of object::method in Java language, hence the operator of double colon is used. As it is only a reference to the method, we are not calling the method, thus we pass no arguments and we do not even write the parentheses after the method name. Any required arguments must be given to the method when the reference is used later.
We can implement the action and its scheduling as follows:
// in method addedToScene of class Cooler
new Invoke<>(this::coolReactor).scheduleFor(this);
Comment
Invoke action class is universal and uses type parameter for the type of actor that can be used with a particular action instance. When using the class we therefore must either
- explicitly specify the type parameter - in the above given example it would be
new Invoke<Reactor>(...), or - let the compiler to infer the argument from the context (if possible).
We achieve the type argument inference with the diamond operator with notation new Invoke<>(...). If we omit this operator on the type with type parameters, the compiler will handle it the way that is backward-compatible with older versions of Java, and will consider it as so-called raw type.
This action, however, will not meet our expectations: method coolReactor() will be called only once and after that it is considered finished (isDone() will return true). We can achieve repeated execution of action by composing Invoke with action Loop (available in GameLib), which simply calls another action given as an argument to its constructor and is always considered not completed (isDone() of action Loop always returns false):
// in method addedToScene of class Cooler
new Loop<>(new Invoke<>(this::coolReactor)).scheduleFor(this);
Comment
Action Loop implements design pattern Decorator.
Task 3.4
Verify correctness of your implementation by starting a reactor and connecting at first only cooler to it, and then two coolers at the same time.
The more coolers you connect with reactor, the sooner will reactor be cooled down. Beware, however, that reactor cannot be cooled to negative temperature.
Step 4: Defective Light
Our analytic team defined defective light as light which is defective. Since we can assume that defective light was all right at first, we can derive its behaviour from the well-functioning light. In this case, the defectiveness will be manifested by blinking of light at irregular intervals.

DefectiveLight.Task 4.1
In package sk.tuke.kpi.oop.game create class DefectiveLight which will be descendant of class Light.
Task 4.2
In class DefectiveLight create method which will define behaviour of defective light.
To achieve the effect of defective light you can use any approach you like. One of them could be e.g. generating random number in range from 0 to 20 and if the generated number is 1 the state of light will change from off to on and vice-versa.
Comment
In Java you can obtain random number by using instance of class Random or simply by calling static method Math.random().
Task 4.3
Schedule behaviour of defective light by using actions Loop and Invoke.
Task 4.4
Verify correctness of your implementation by creating defective light and connecting it to reactor.
Remember that type of parameter in method addLight() in class Reactor needs no change. The principle of polymorphism is used right here: DefectiveLight as descendant of class Light can be used wherever type Light is accepted.
Step 5: Repository
Task 5.1
Upload (commit and push) your source code to your GitLab repository. You should do it before the following exercise. Also, prepare questions that you want to discuss on the following exercise.
Upload your implementation even if it's not yet complete. We recommend to comment out parts of the code that could cause compilation errors.
Additional Tasks
Task A.1
Create class SmartCooler which will represent upgraded Cooler that will automatically turn on and off depending on temperature of reactor.
By using smart cooler ensure that operational temperature of reactor will be maintained in range from 1500 to 2500 degrees. This means that cooler will cool down connected reactor only when its temperature rises above 2500 degrees. However, if its temperature drops below 1500 degrees, cooler will stop cooling down the reactor.
In this case it will be interesting to observe how cooler turns on and off on its own depending on its activity.
Comment
Remember that part of smart cooler's functionality is already implemented in class Cooler. Therefore, avoid duplicating the code and take the opportunity to call method of superclass.
Task A.2
Create class Helicopter for combat helicopter that will follow the player and attack him when it reaches him.
In the class implement public method searchAndDestroy() which will initiate pursuit of player. The movement of helicopter towards the player when helicopter chases him should be implemented in method created for action Invoke. When helicopter meets player, ensure that player's energy will decrease by 1. For animation of helicopter use image heli (download it into project's directory src/main/resources/sprites).
Comment
In this task do not override method addedToScene() in class Helicopter! Think about more appropriate place for scheduling the action.
Comment
For obtaining reference to object of player, have a look at methods which are available on the object of game scene. Player is of type Player and has name Player. To check if helicopter actually touches (collides with) player, use suitable method which is accessible on the actor object.
Additional links
- Java Tutorial: Inheritance
- Java Tutorial: Generic types
- Java Tutorial: Bounded Type Parameters
- Java Tutorial: Method references